
I have a confession: I have the heart of a DIYer, but…I’m not sure I’m actually good at it. To the point that I know many of the projects I’ve taken on have ended up costing me more money by trying to save money. Oh, the irony. This is due to several reasons: I complete a project that eventually falls apart and needs to be replaced, I start a project and just never complete it, I take on a project where the material costs aren’t really much cheaper than just buying the dang thing.
Don’t get me wrong: I think DIY is an absolutely amazing thing, and have seen many people do things that make my jaw drop. DIY is a fantastic tool for creating your own custom-designed anything. Can’t find it on the market? Make it! Can’t afford what’s on the market? Make it! Want to renovate rooms in your home little by little without the wild cost of labor? DIY it!
But I think to say DIY is always a money saver, no matter what, is simply just not true. In fact, at times, it may cost you *more*. Sure, you get the satisfaction of completing something, learning a new skill, and putting a personal mark on your home. But things don’t always go according to plan. The Internet has fooled us all into thinking we can and should just do it all ourselves (more on that later—keep reading) but, ::gestures with finger to come in closer:: …we don’t.
Now, there are some things I’m fully adept at doing, and we each have our own list of things, even if it’s a short list. I can sew, am fairly handy with crafting, am a very good wall and furniture painter, can install my own lights (thanks Jess for teaching me!), and I can work a drill fairly well. Do I dream of being able to use a table saw to build my own bookcases and raised garden beds? Absolutely! Will I have wished I just bought them or hired an expert to make three seconds into those projects? Absolutely!
My DIY Successes: A Short List
Let’s take a look at what I have done successfully, and then we can explore all my failures.
For my bedroom reveal a few years back, I sewed that extra-long lumbar pillow because I couldn’t find a king-size pillow in a fabric I liked. I’m very adept at sewing easy things like pillows, so making soft decor items like these, napkins, curtains and even bedskirts will almost always be worth it to me. For a similar pillow, including the insert but not the fabric, it likely would have cost me at least $100 for a workroom to make (you can see some numbers on this site to get a sense).
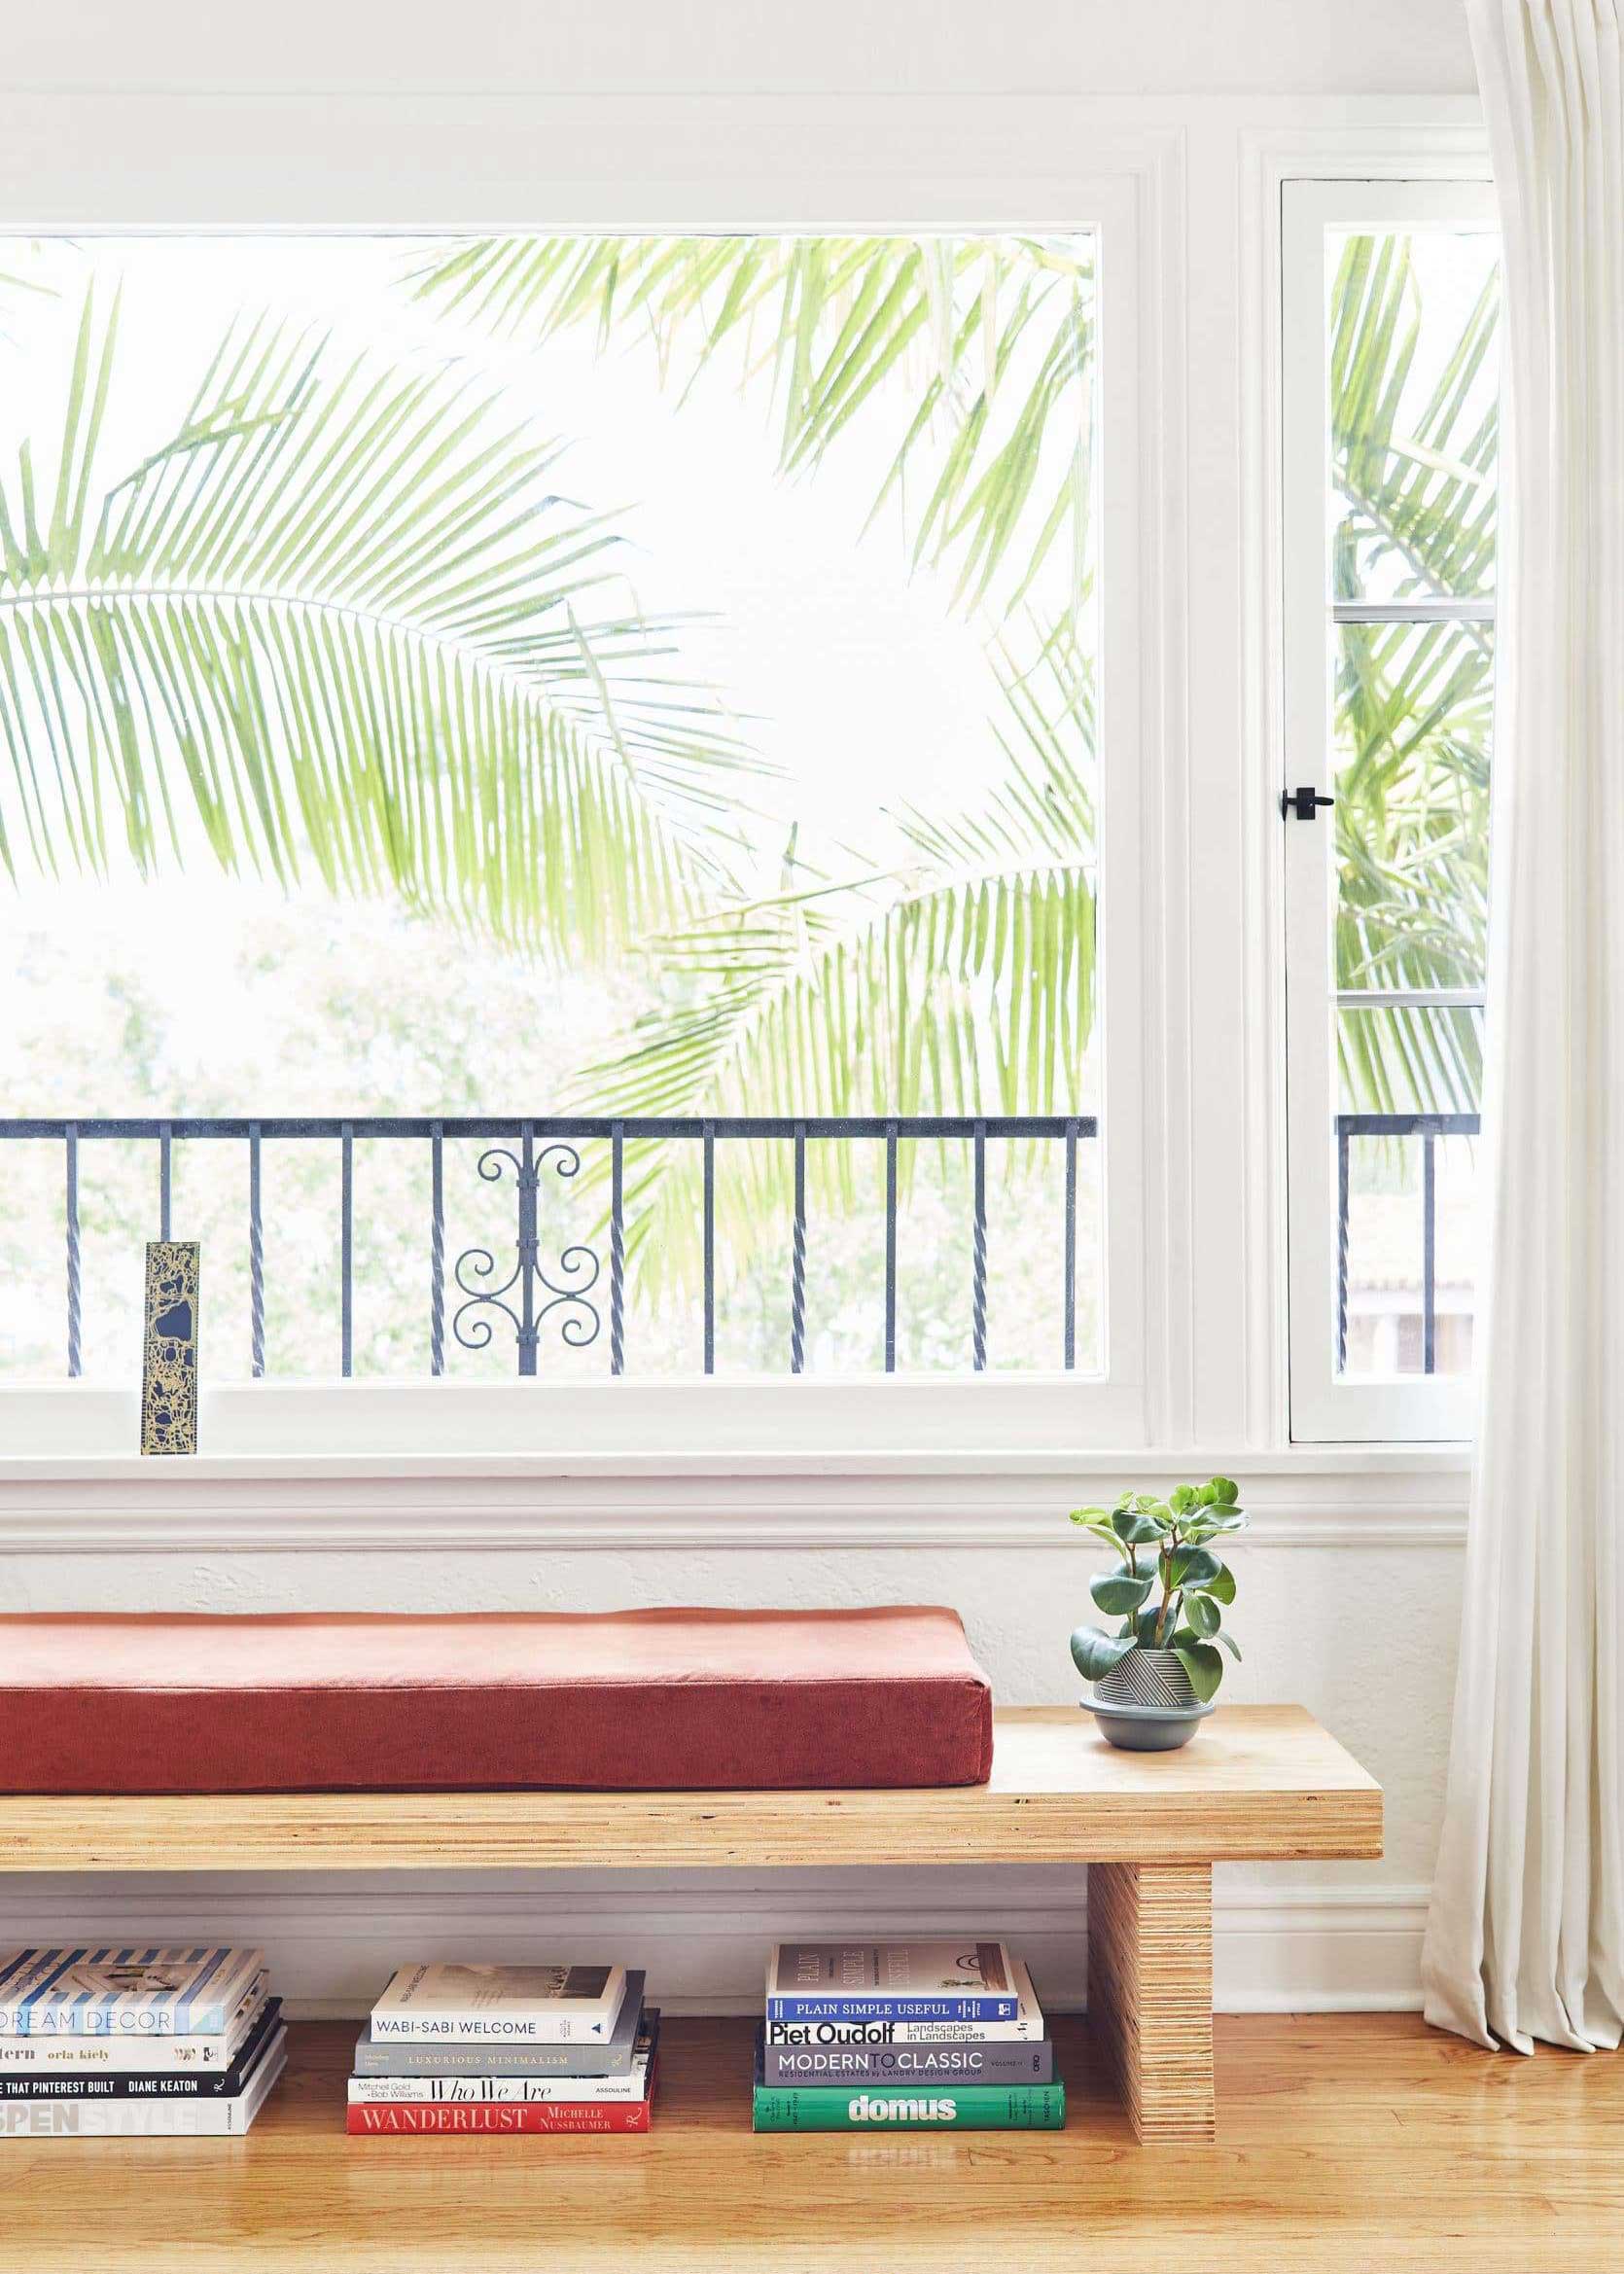
Another DIY I made because it simply wasn’t something I could buy was my picture frame above my sofa. It was so easy, and is still going strong in my current dining room. The same goes for the window bench, though admittedly, I did not make the bench itself (Shade, Sara’s brother, made it for me but I know I could have done it with the proper tools and space). The bench cushion on the other hand was not within my wheel house and I ended up pinning parts of it together when I couldn’t figure out how to get the corners right…ay.
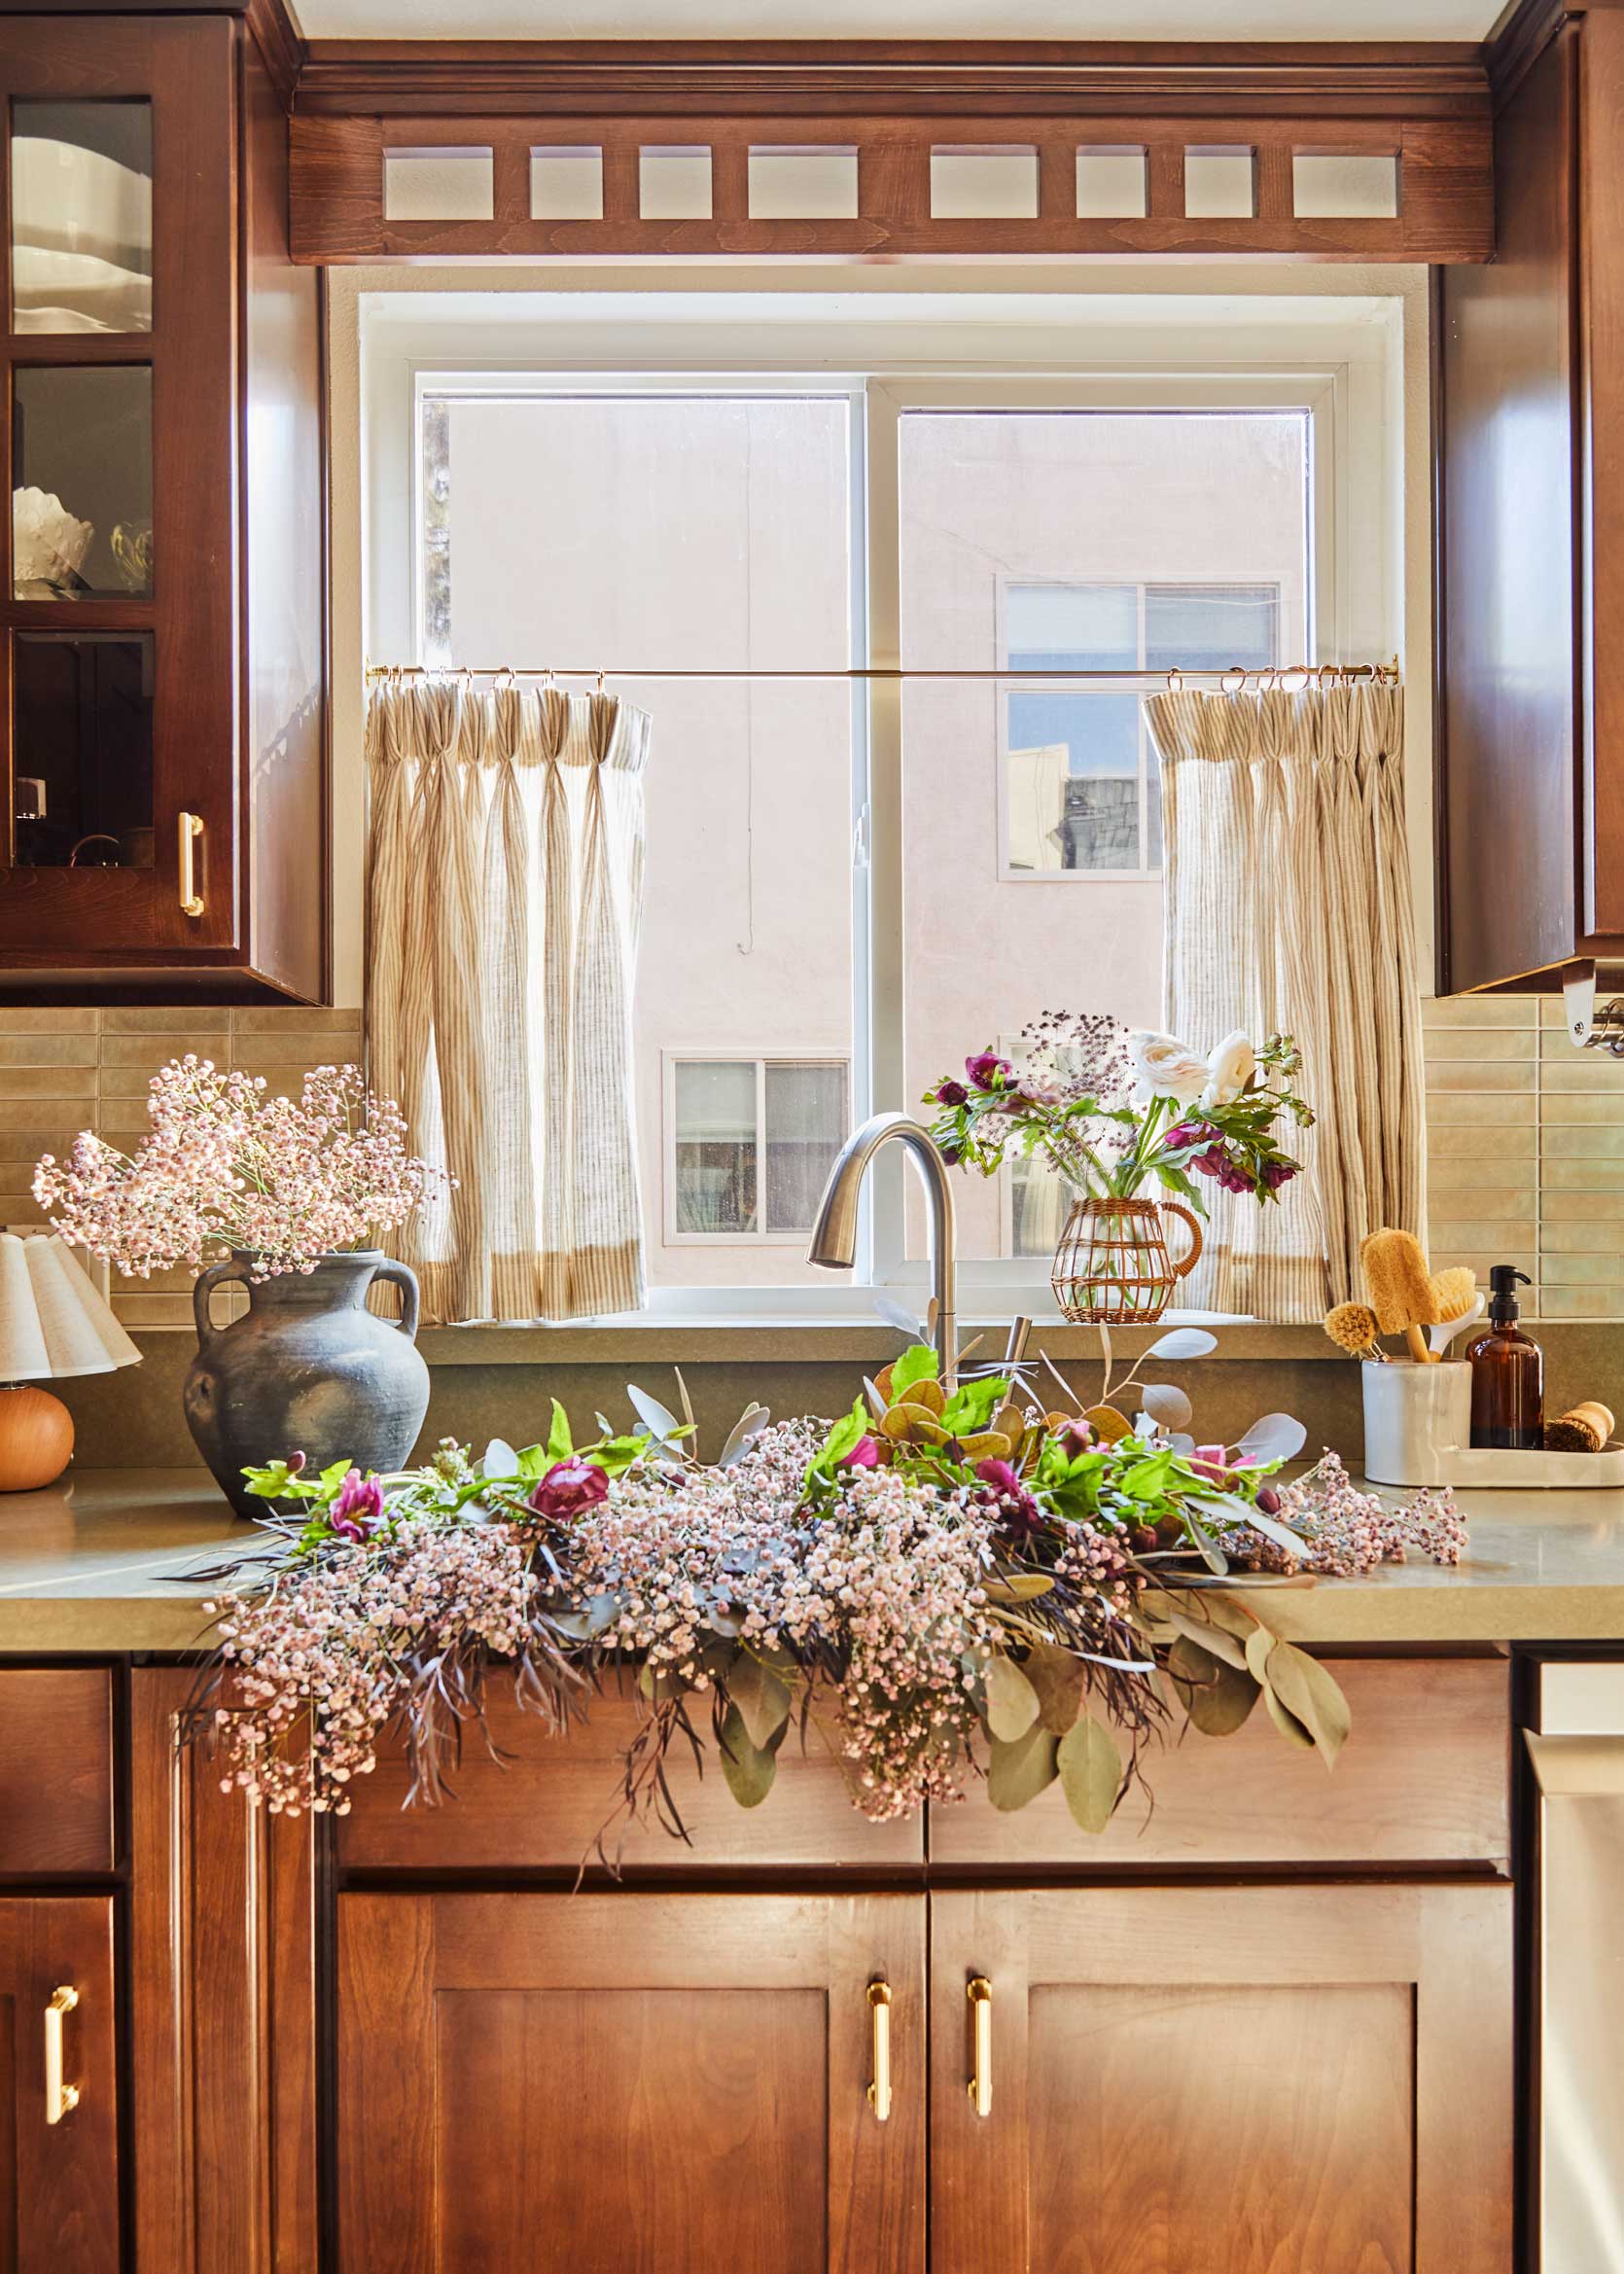
Two more sewing projects: The little chair pillow in my previous bedroom and the cafe curtains in my current kitchen, though if you look at the curtains closely, the edges are pretty wonky because I find linen very hard to sew square without bunching or shifting/stretching.
But alas, let us explore my failures:
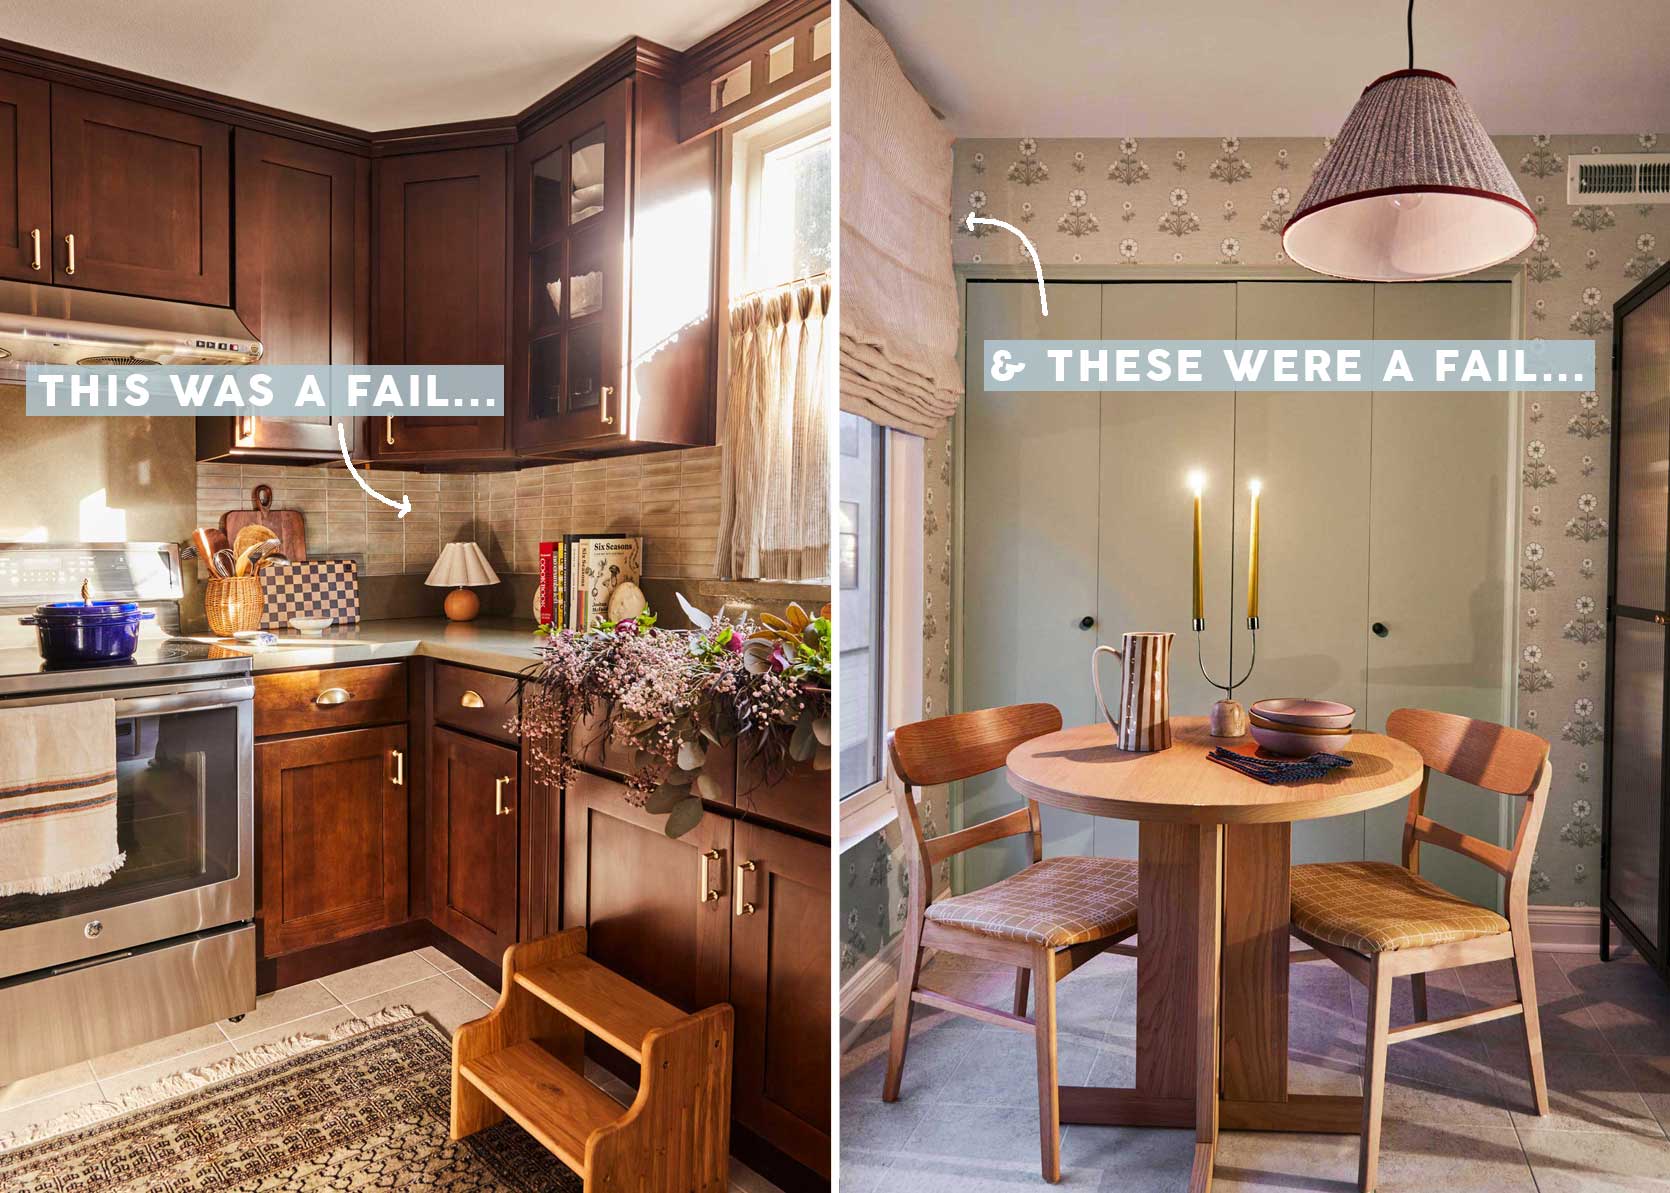
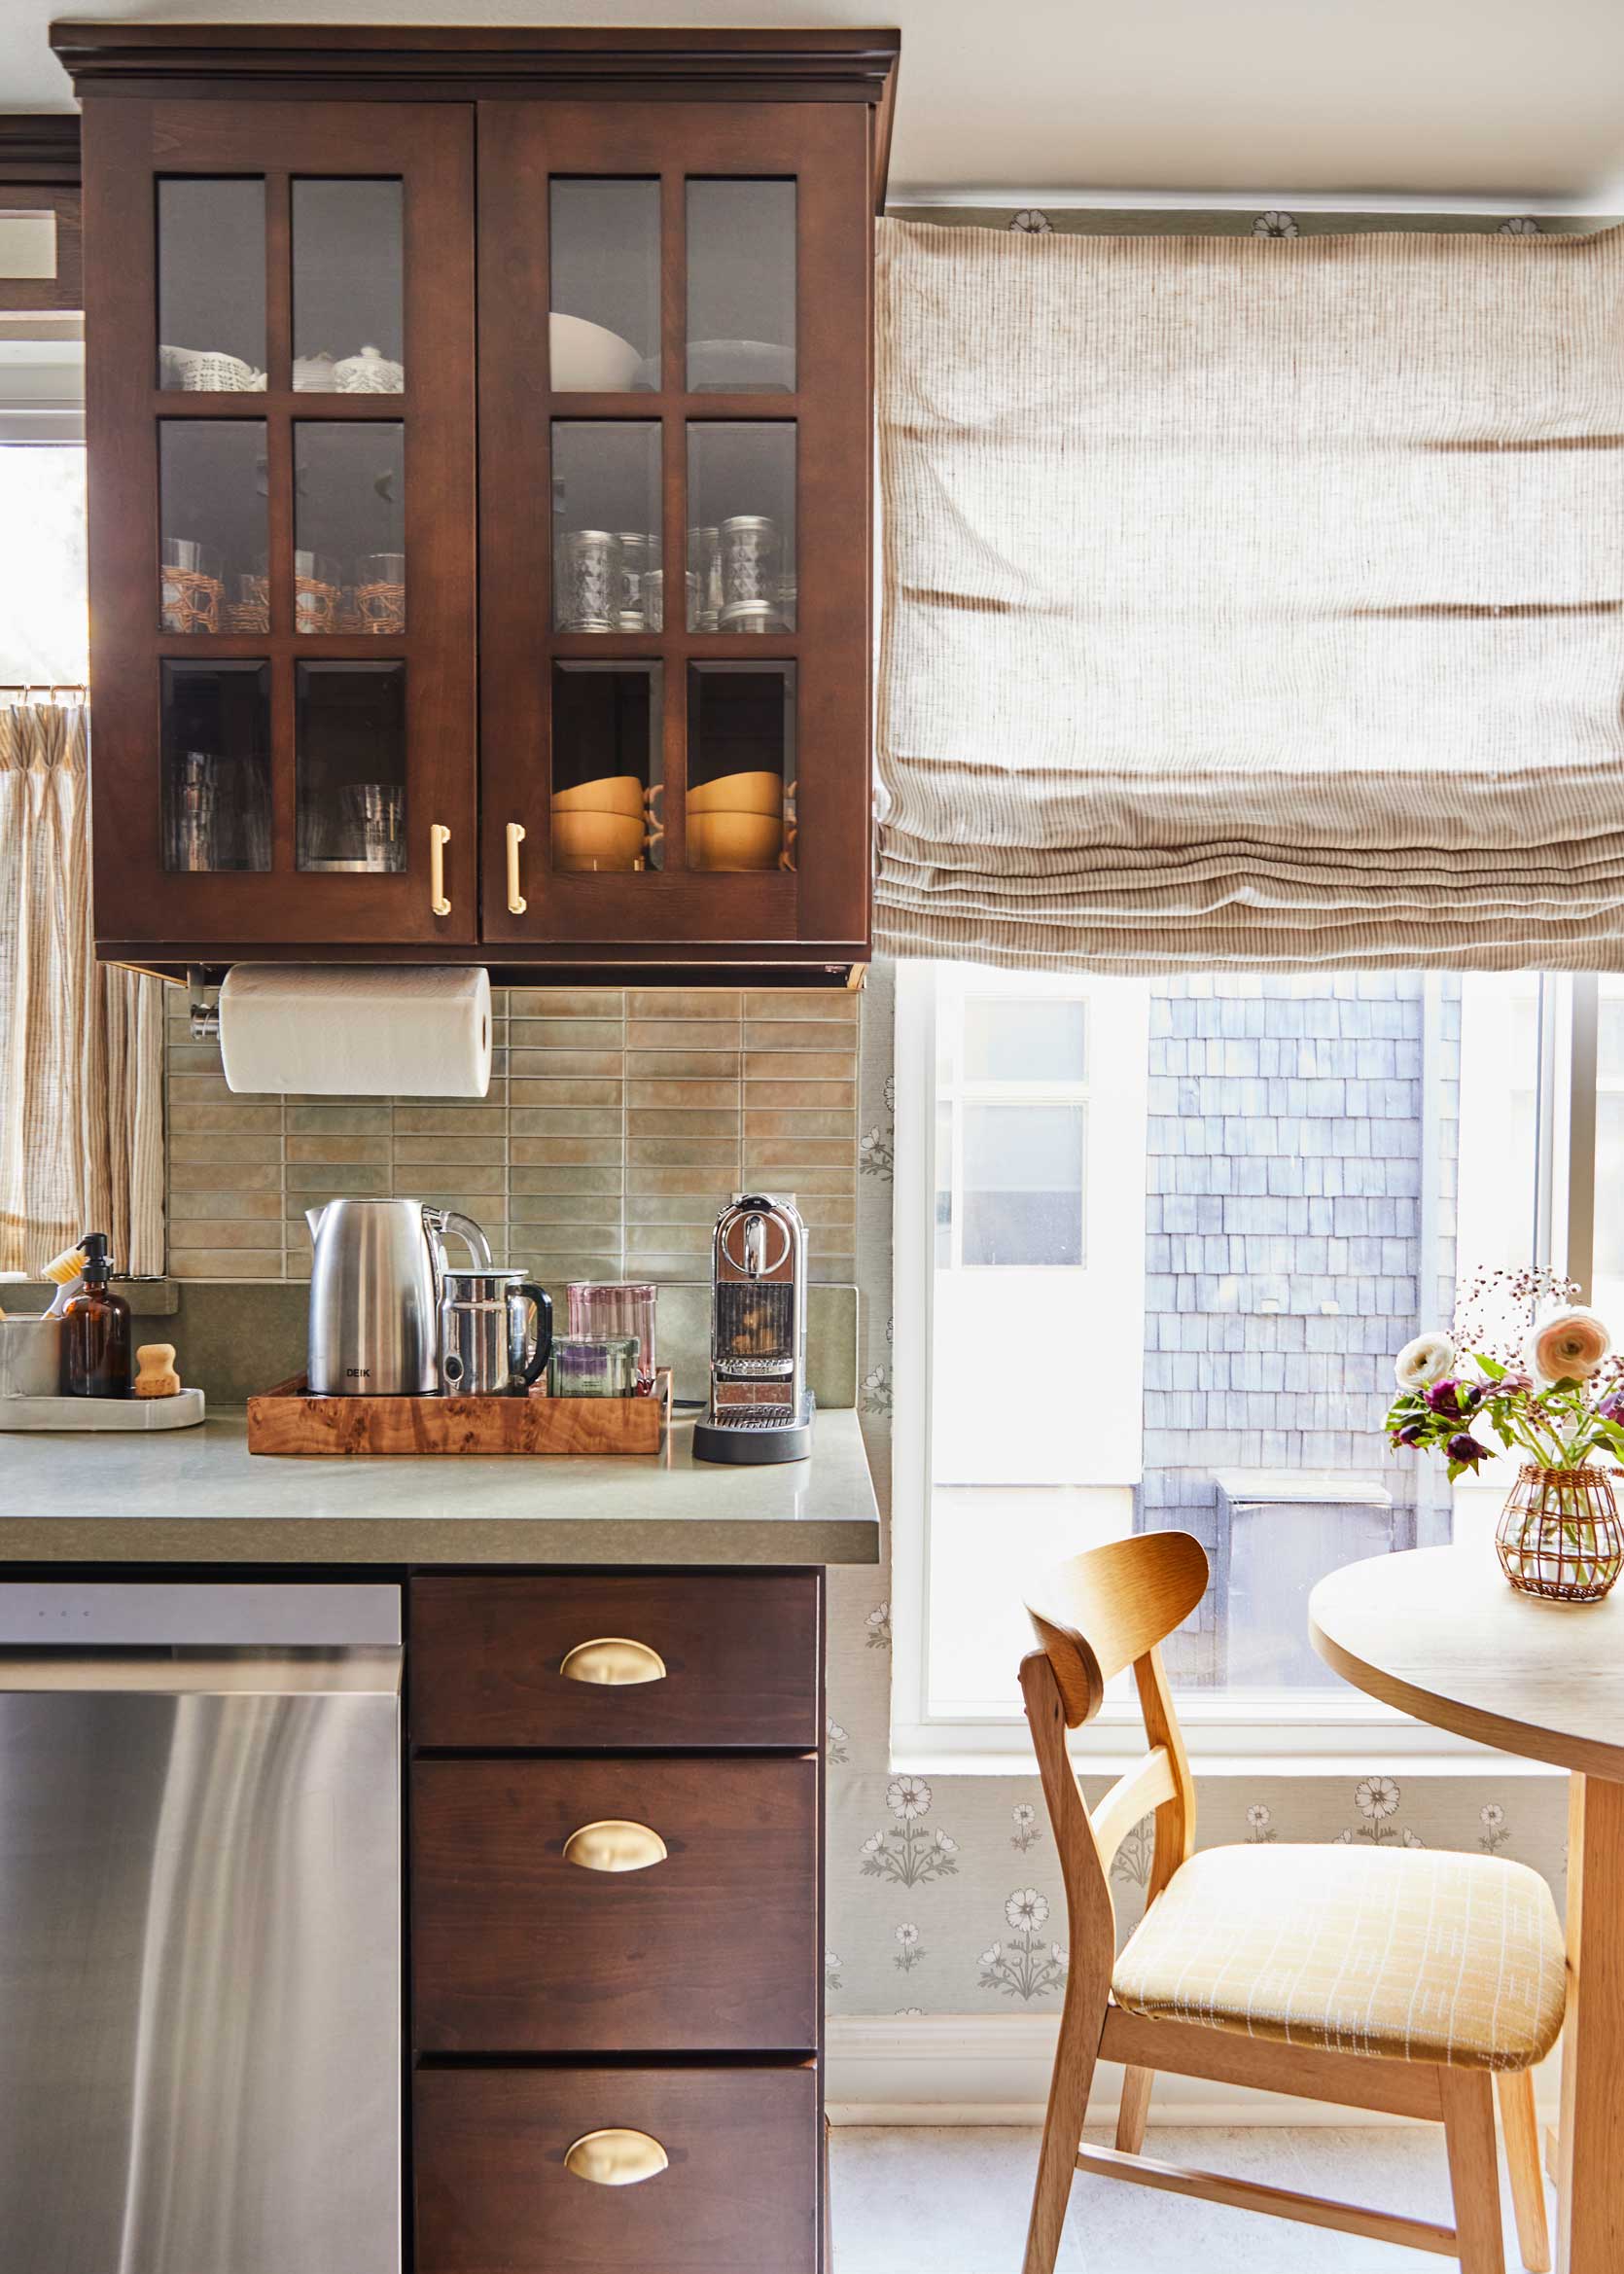
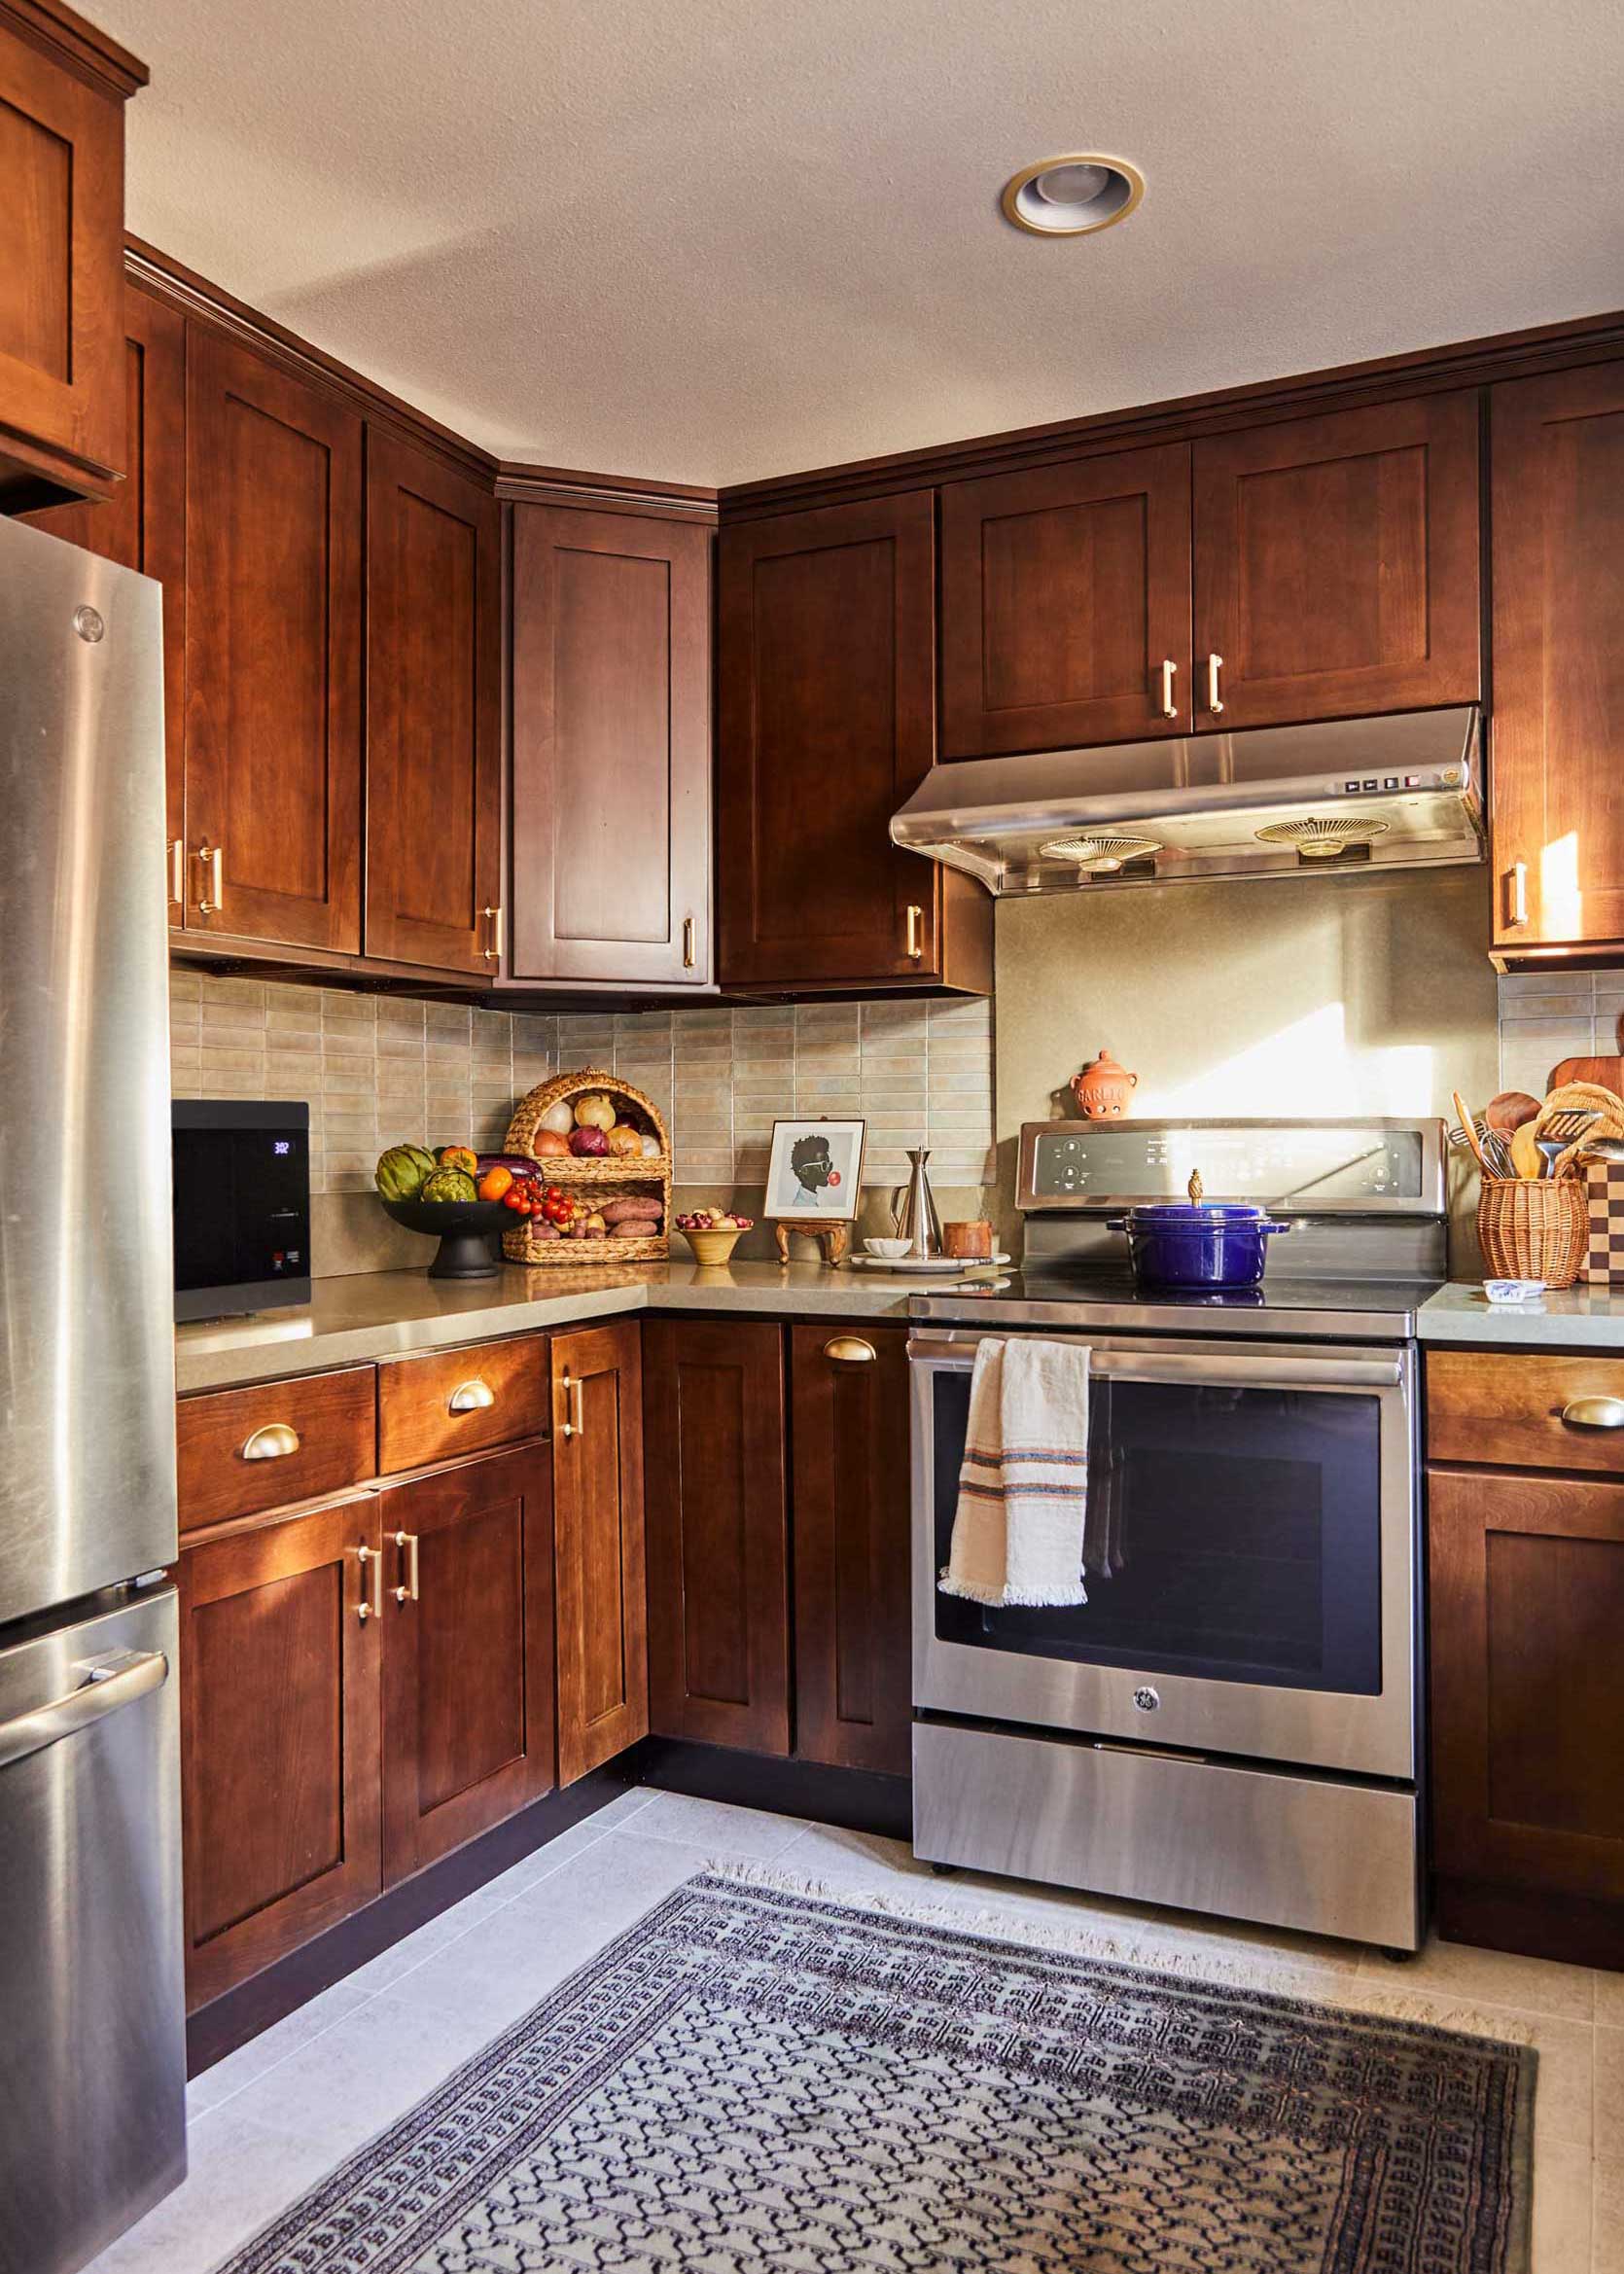
When I completed my rental kitchen refresh back in 2023, I was SO very happy with it. The end result looked great, warm and welcoming. I managed to save a ton of money buying second-hand appliances, making my own Roman shades, putting up a peel-and-stick backsplash and even making my own light fixture. But well, it didn’t all hold up its end of the bargain.
The Disastrous Backsplash
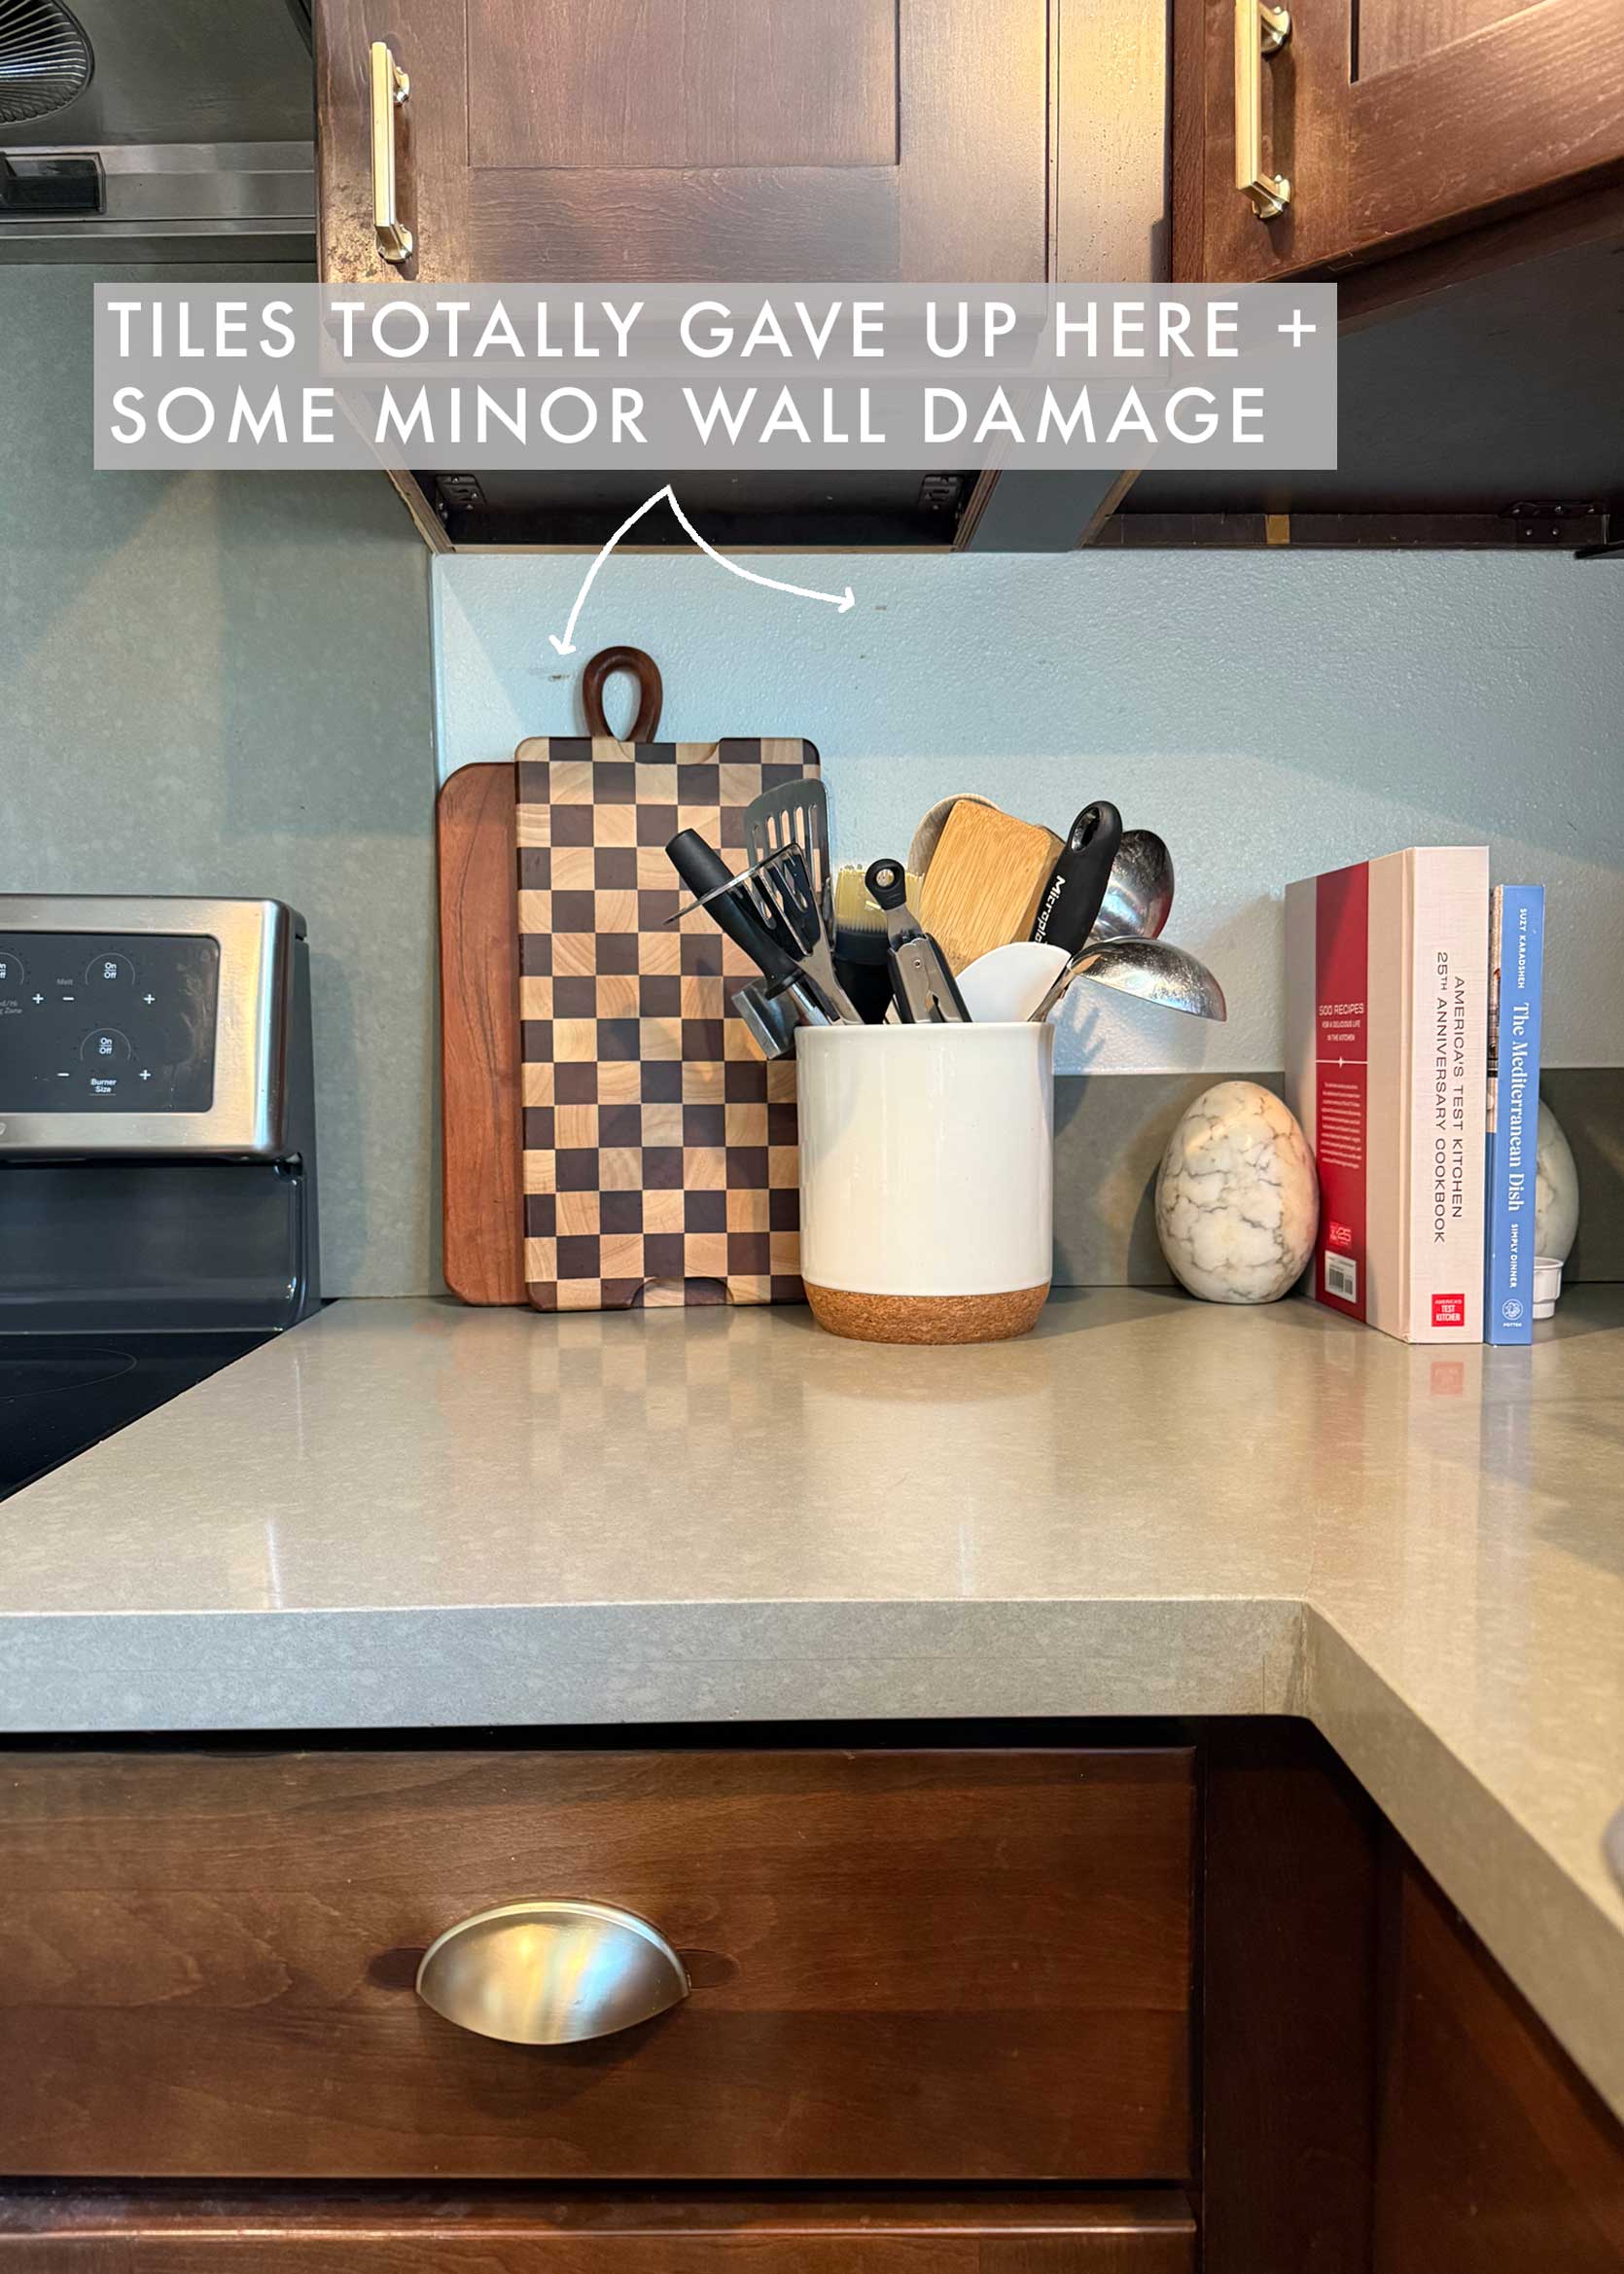
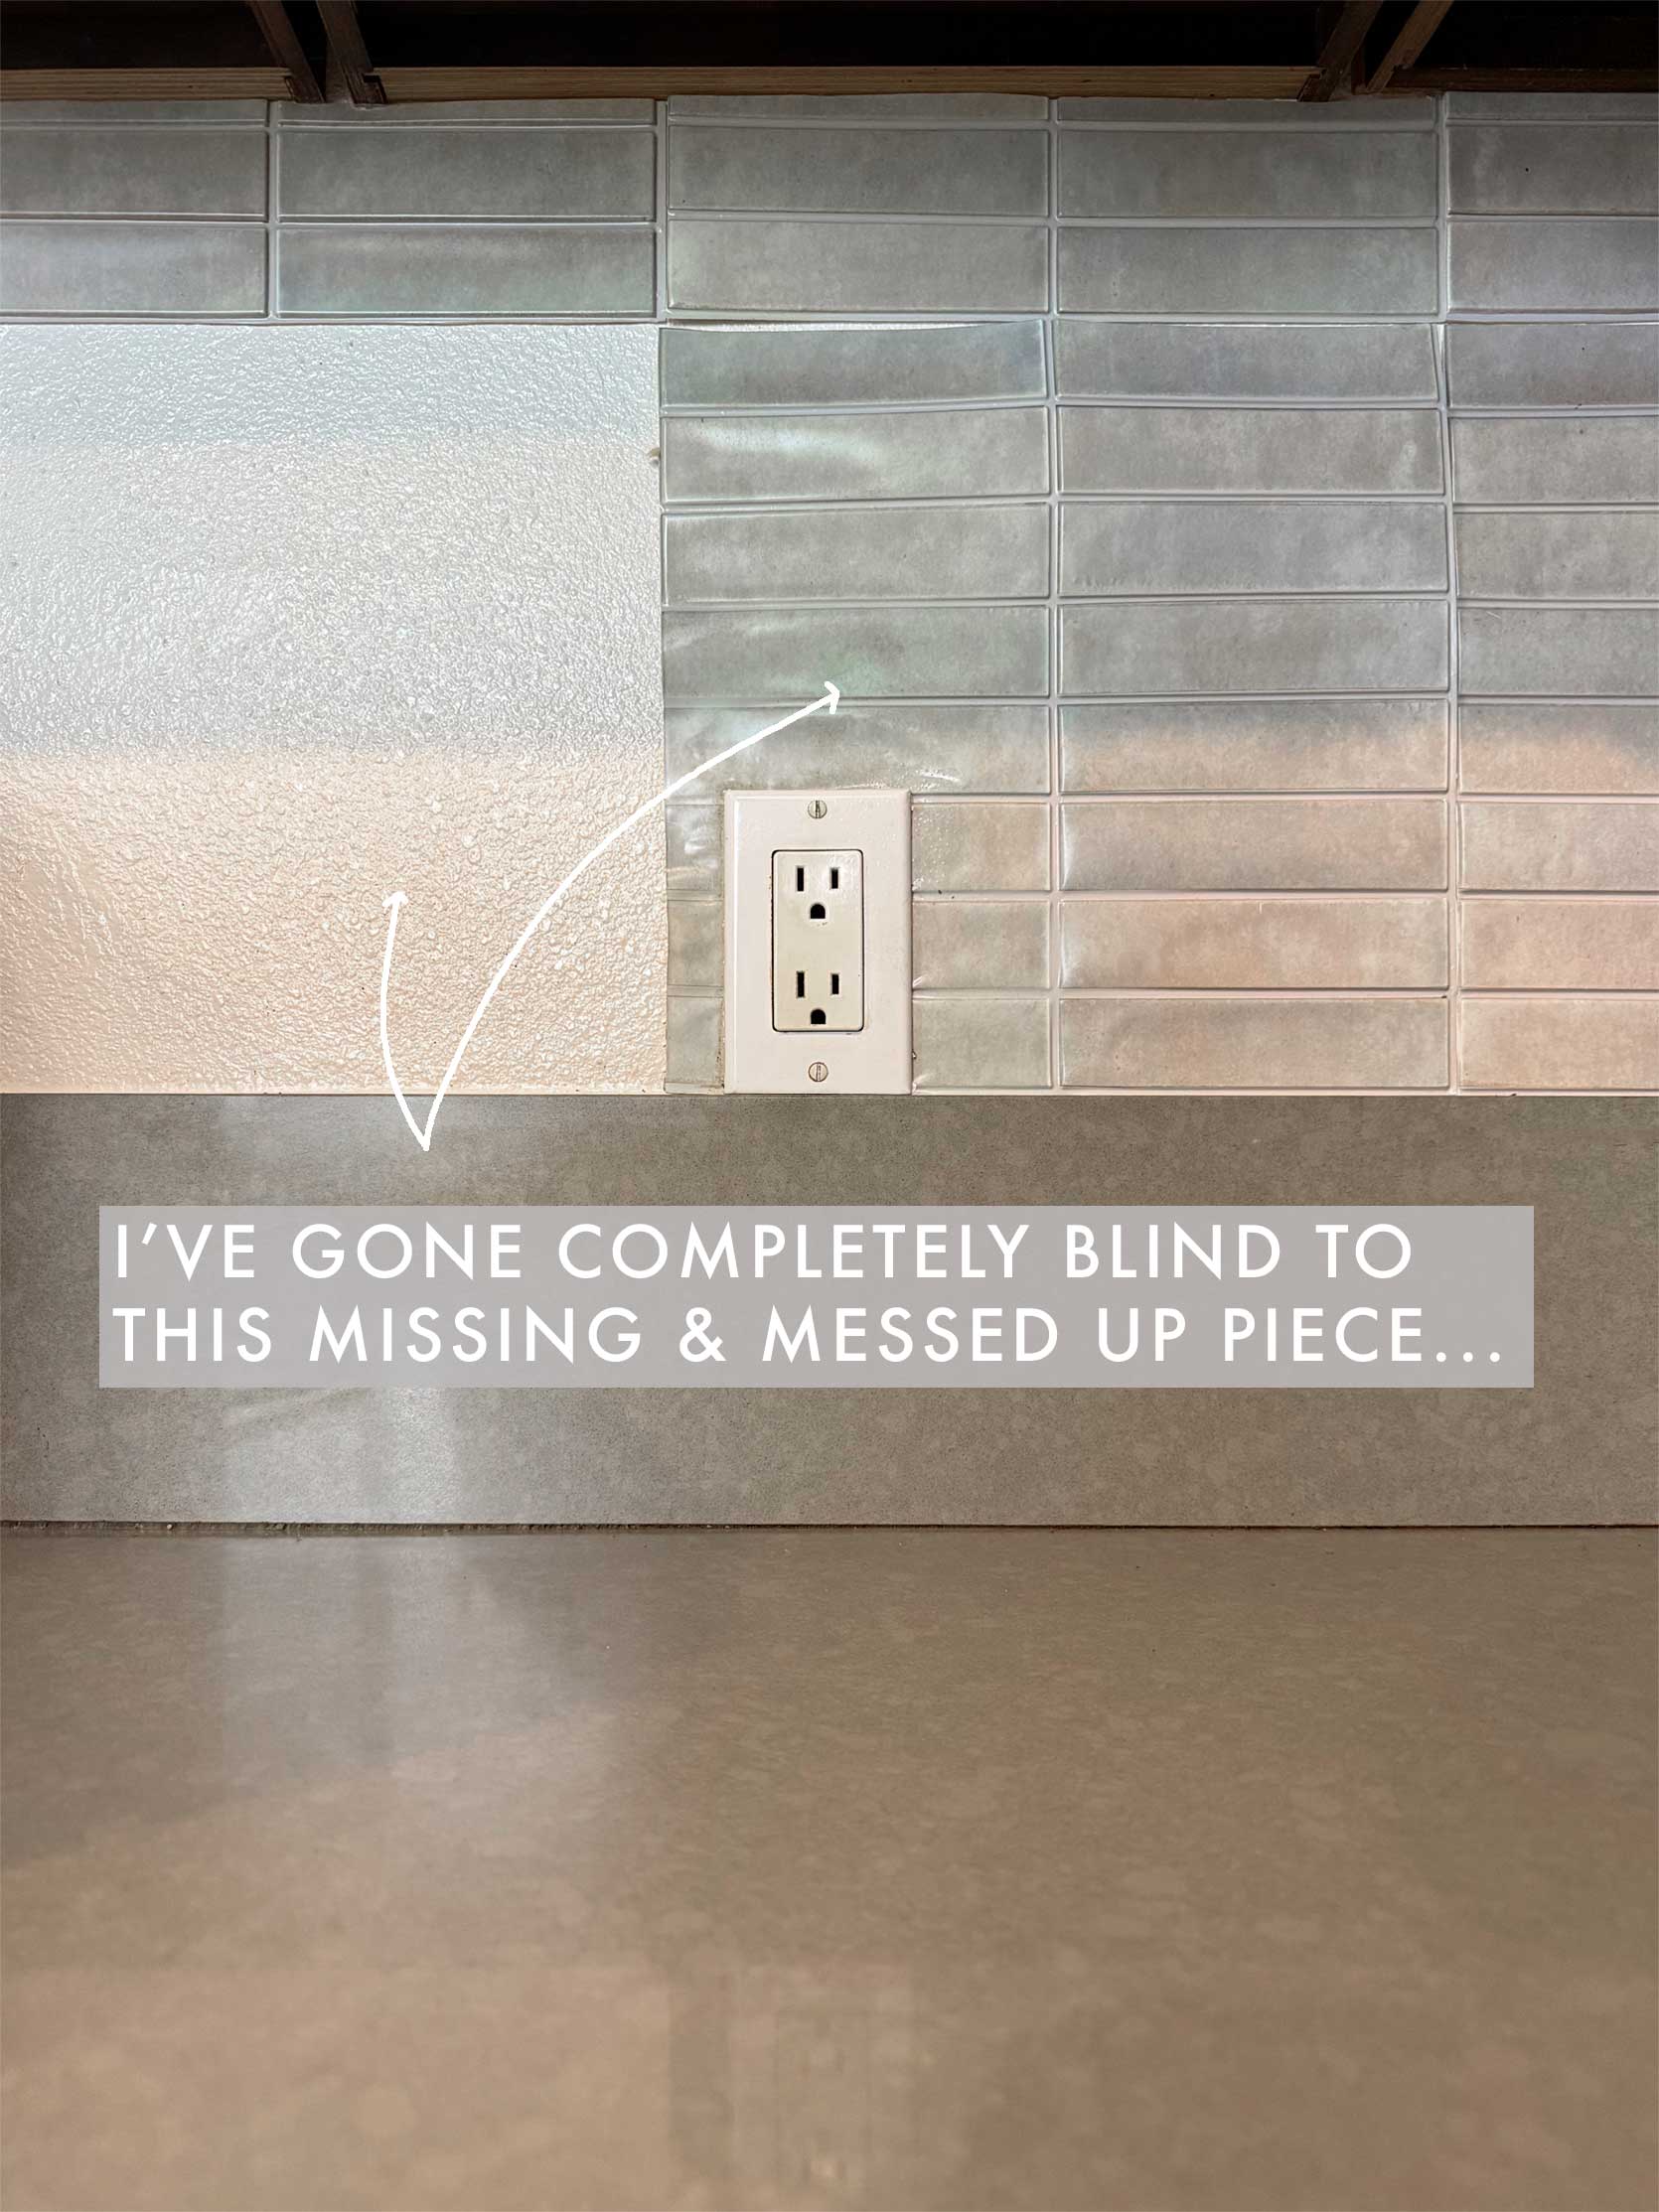
You know those things in your house that you’ve gone blind to? That you forget are the way that they are until someone new comes over and then suddenly you see EVERYTHING, panic, feel embarassed…all the things? That is my plastic kitchen backsplash. It was peeling off so badly on some stretches of wall that I just took it off. On the other side, only a piece or two are missing or kind of sadly just hanging limply off the wall. It’s so bad.
Honestly, I should have known. The reviews weren’t great, claiming the adhesive wasn’t strong. Some reviews said they had re-engineered it so I was hopeful, but from the very beginning, it was a bust. My walls are slightly textured, and the paint is semi-gloss, which together, works against anything sticky.
This was clearly a failure of product, not a failure of DIY, but still, I want to break down what I spent on this, and what I might have spent on a proper tile installation, just to see:
What I spent on peel-and-stick tile: $35.99 x 4 packs to cover ~30 square feet + 10% waste and reserve = $144
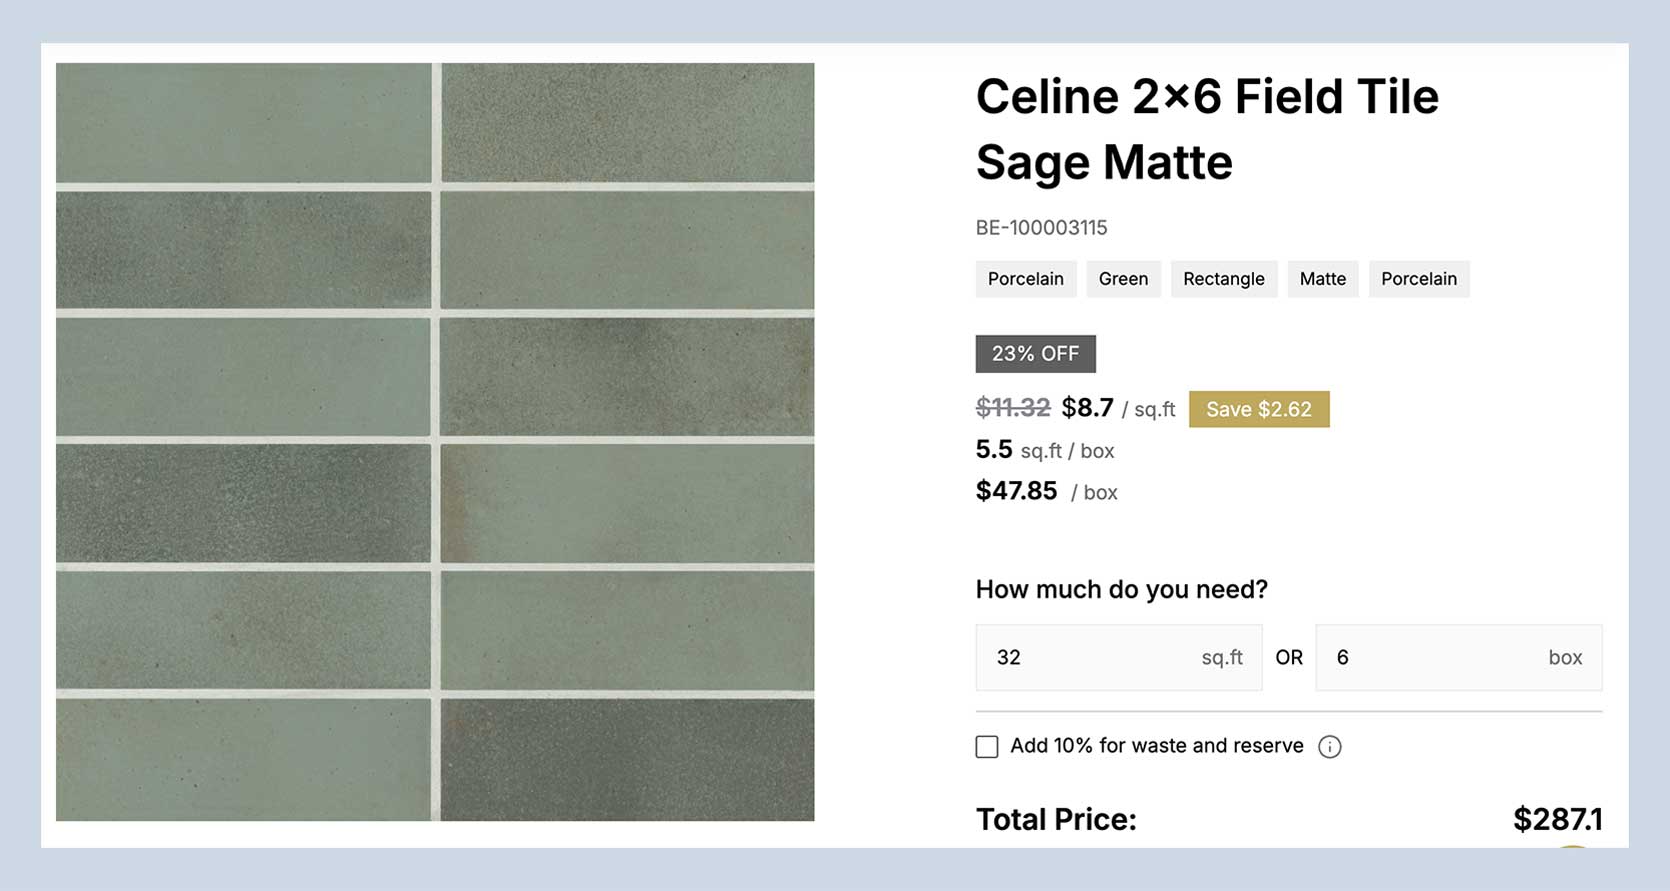
What a tile job might have cost: ~$287 for this tile. Install could be anywhere from $10 to $20 per square foot (it’s a simple subway tile with no funky angles, just three outlet cutouts, so it would likely be closer to $10-$15 per square foot, so roughly $500 in a best-case scenario). Total cost of material and labor = ~$800
So, while no, a DIYed peel-and-stick backsplash was not more expensive than a real tile backsplash installed by a tradesperson, I wasted $145 because I’m just going to peel it all back and then throw it away (god, that hurts with how wasteful that is). I will likely not replace it as this is just a rental, but in retrospect, if I were an owner, I know the sub-$1,000 project would be long-lasting and well worth it.
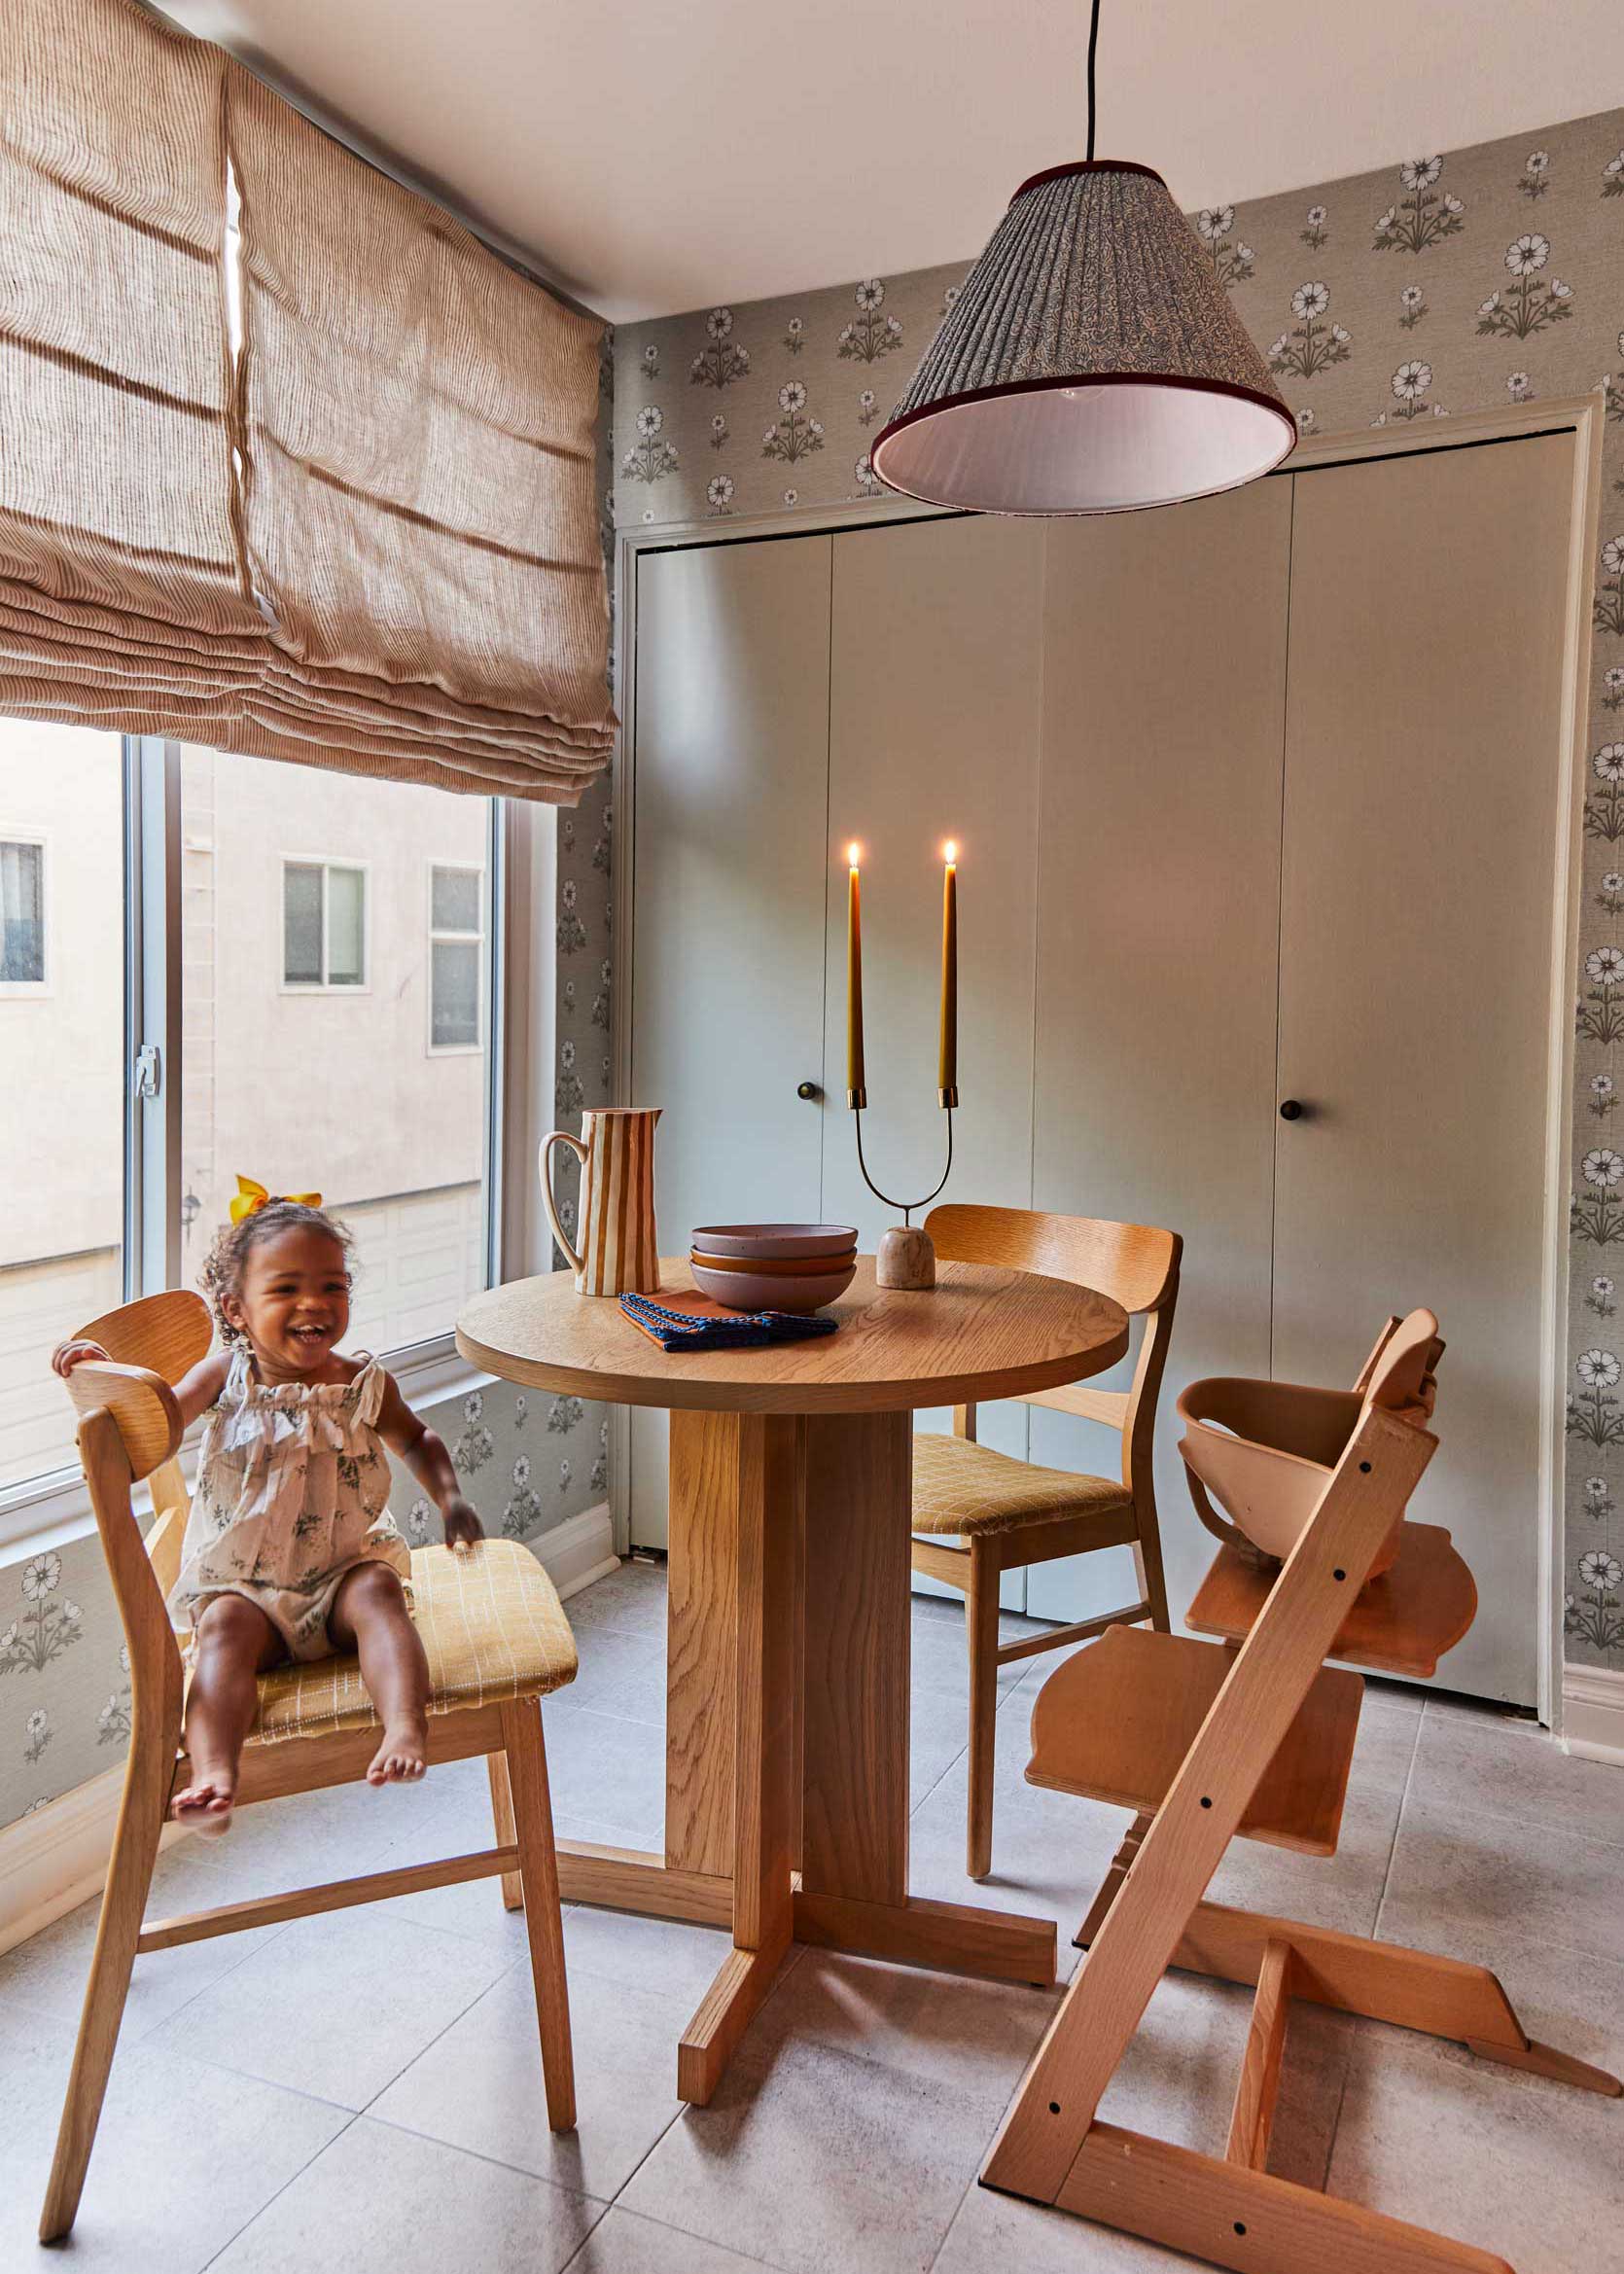
DIY Cordless Lift Roman Shades

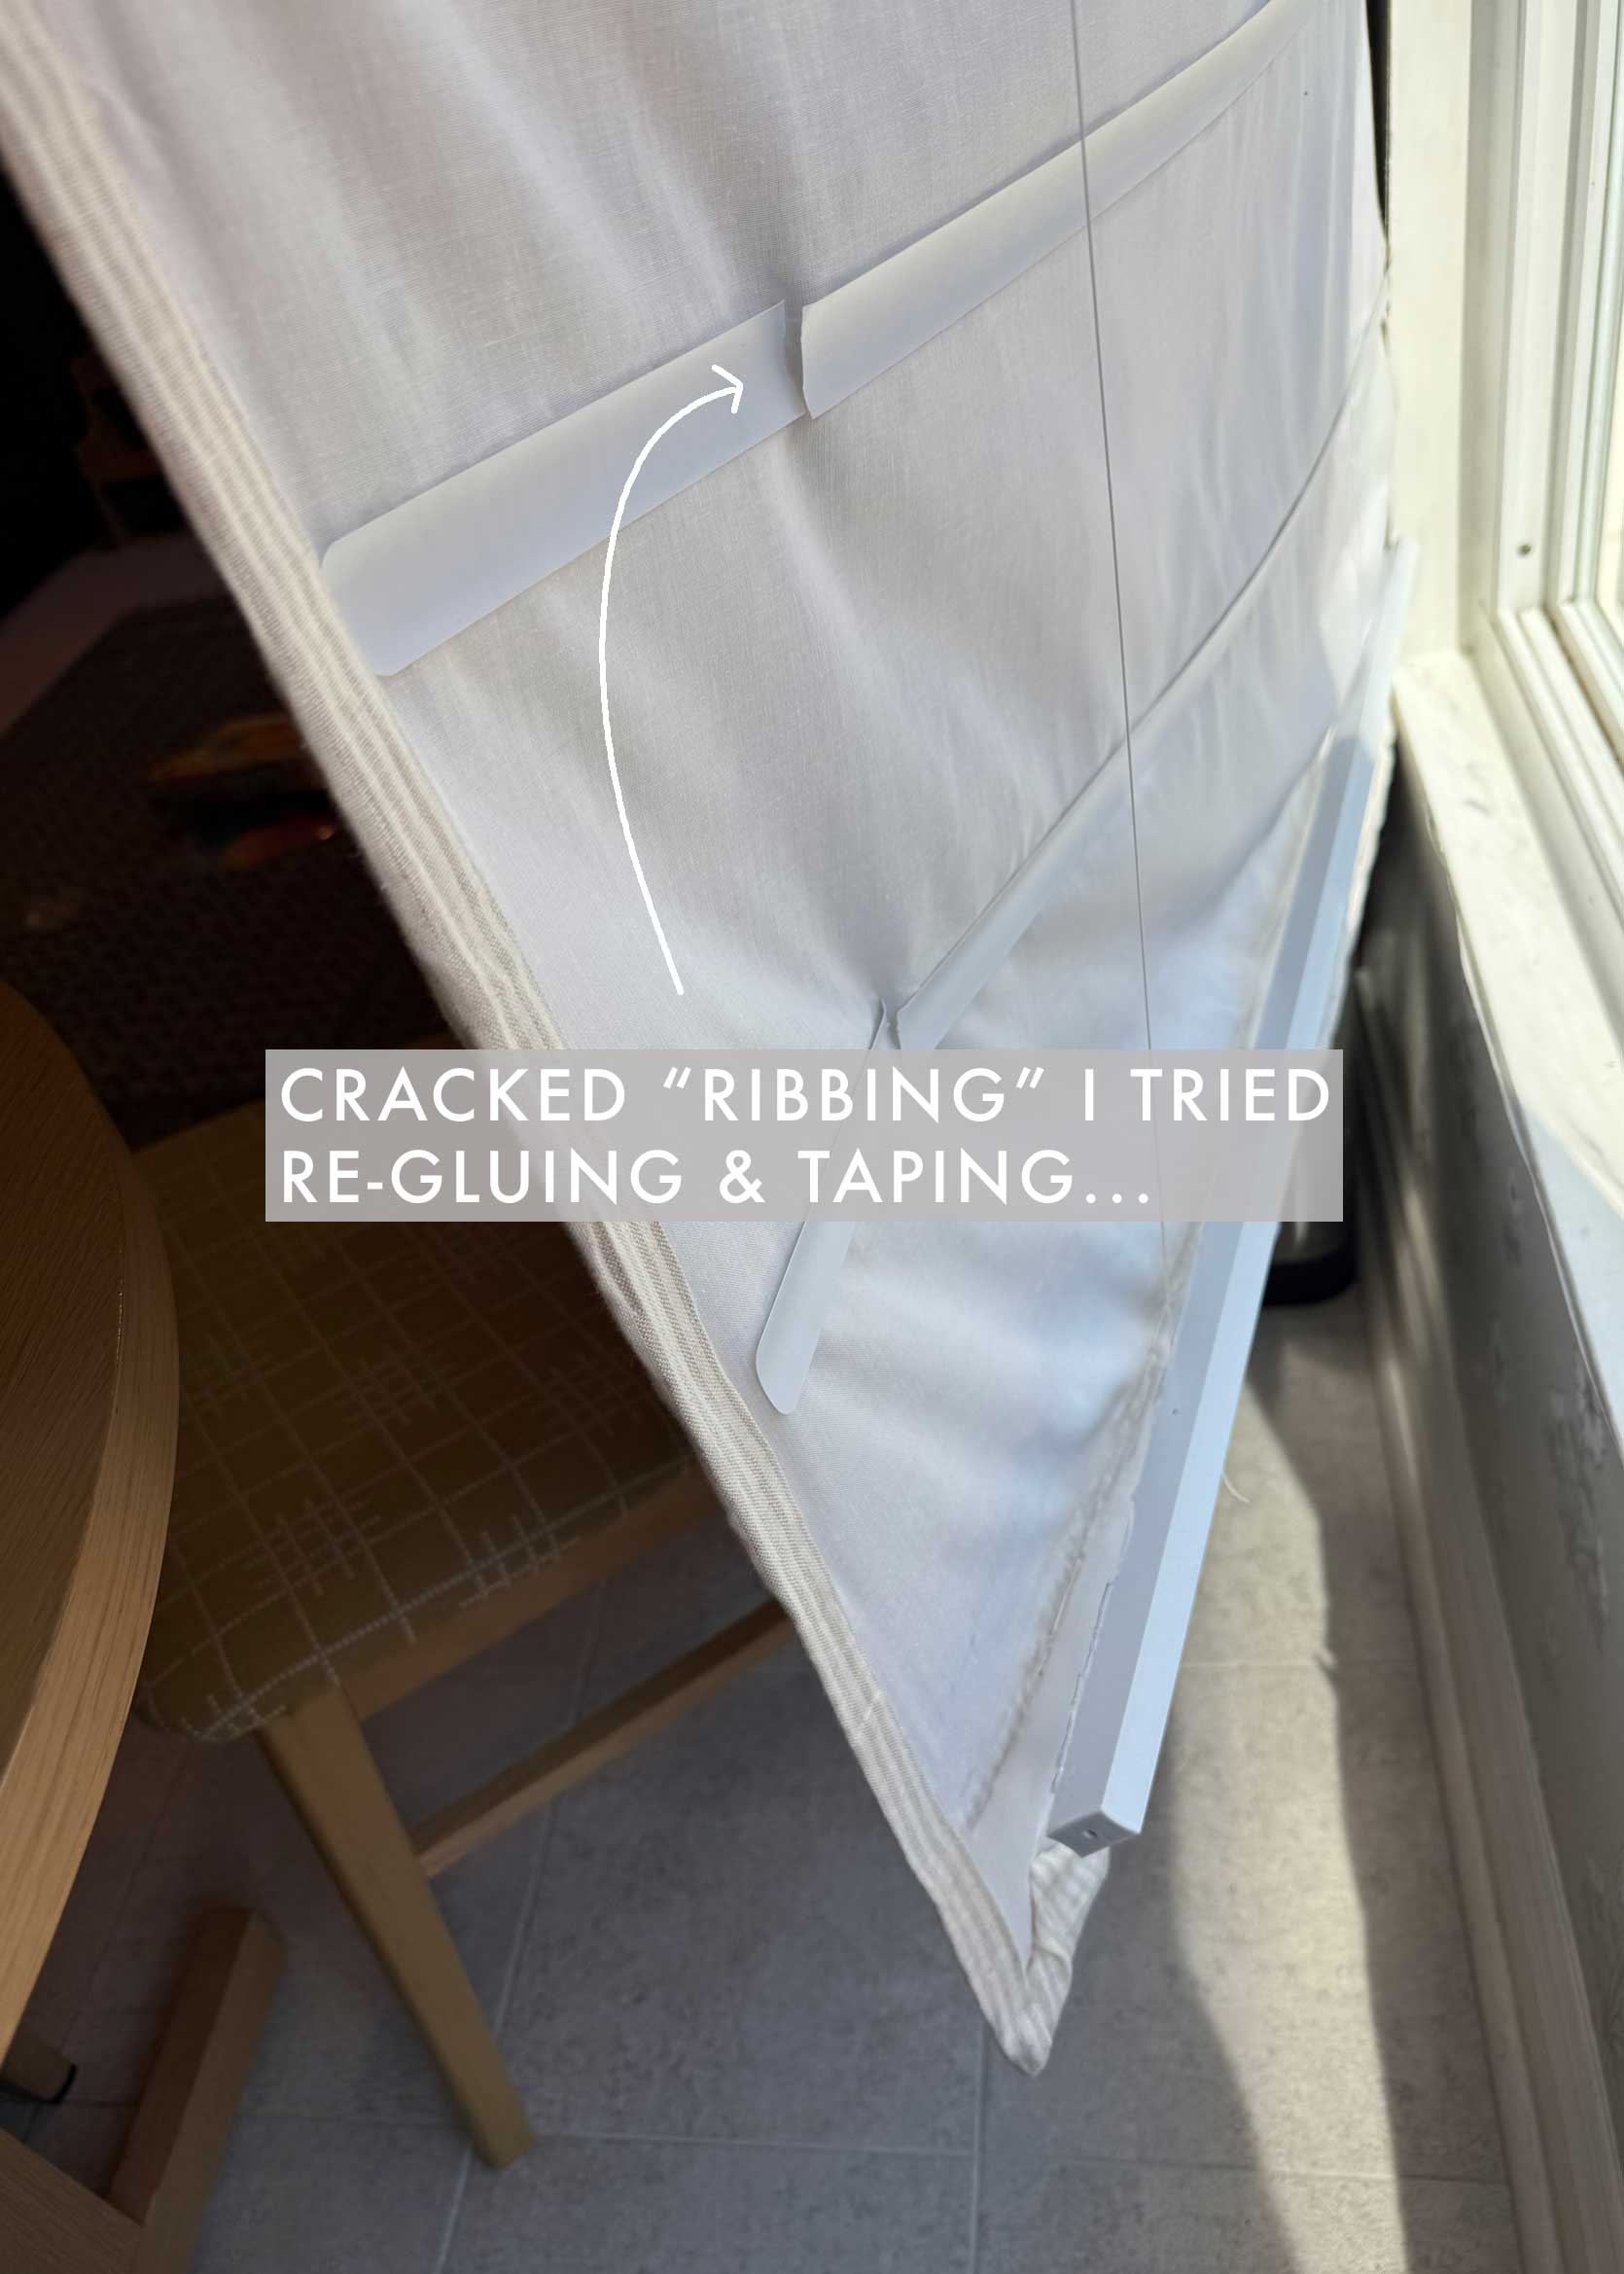
Oh friends, I was so hopeful for this project. Before getting my fabric glue out, I considered sewing actual Roman shades with dowel ribbing. But I was super intimidated by it every time I watched YouTube tutorials. I also went so far as to get a few quotes from local seamstresses. One woman quoted me $600 which at the time felt high, but in retrospect was very fair. I have a GIANT window (70″x72″) so I’d either need two shades or one very wide one.
Seeing those numbers, I hunted around for a “hack” and found this cordless mini blind project. It was easy, cheap, and impressive. But what I didn’t factor in was that my kitchen windows are south-facing, and they get absolutely blasted by afternoon sun. Strong sun + plastic + fabric glue = Bad news.
Probably about three months in, I had to start re-gluing some parts of it. Not even a year in, they were nearly inoperable, just having completely fallen apart, not to mention looking all kinds of a warped, broken mess from street level. Sigh.
I’ve since considered just buying some Roman shades from Select Blinds, whom I used for a shade for my daughter’s room, and was happy with. Having my $600 custom sewing quote in mind (in addition to the cost of fabric), I explored what it would cost to buy direct from a store.
First, here’s what I “spent” on the DIY:
- Cordless lift mini blinds x2: $88
- Fabric x5 yards @ $35 per yard: $175 (transparently, this was gifted to me)
- Lining fabric x5 yards @ $10 per yard: $50 (also gifted)
- Fabric glue x2: $24
- Total: $337 ($112 out of pocket with gifted fabric)
Here are some pretty Roman shades I’ve been looking at from a fairly discounted website:
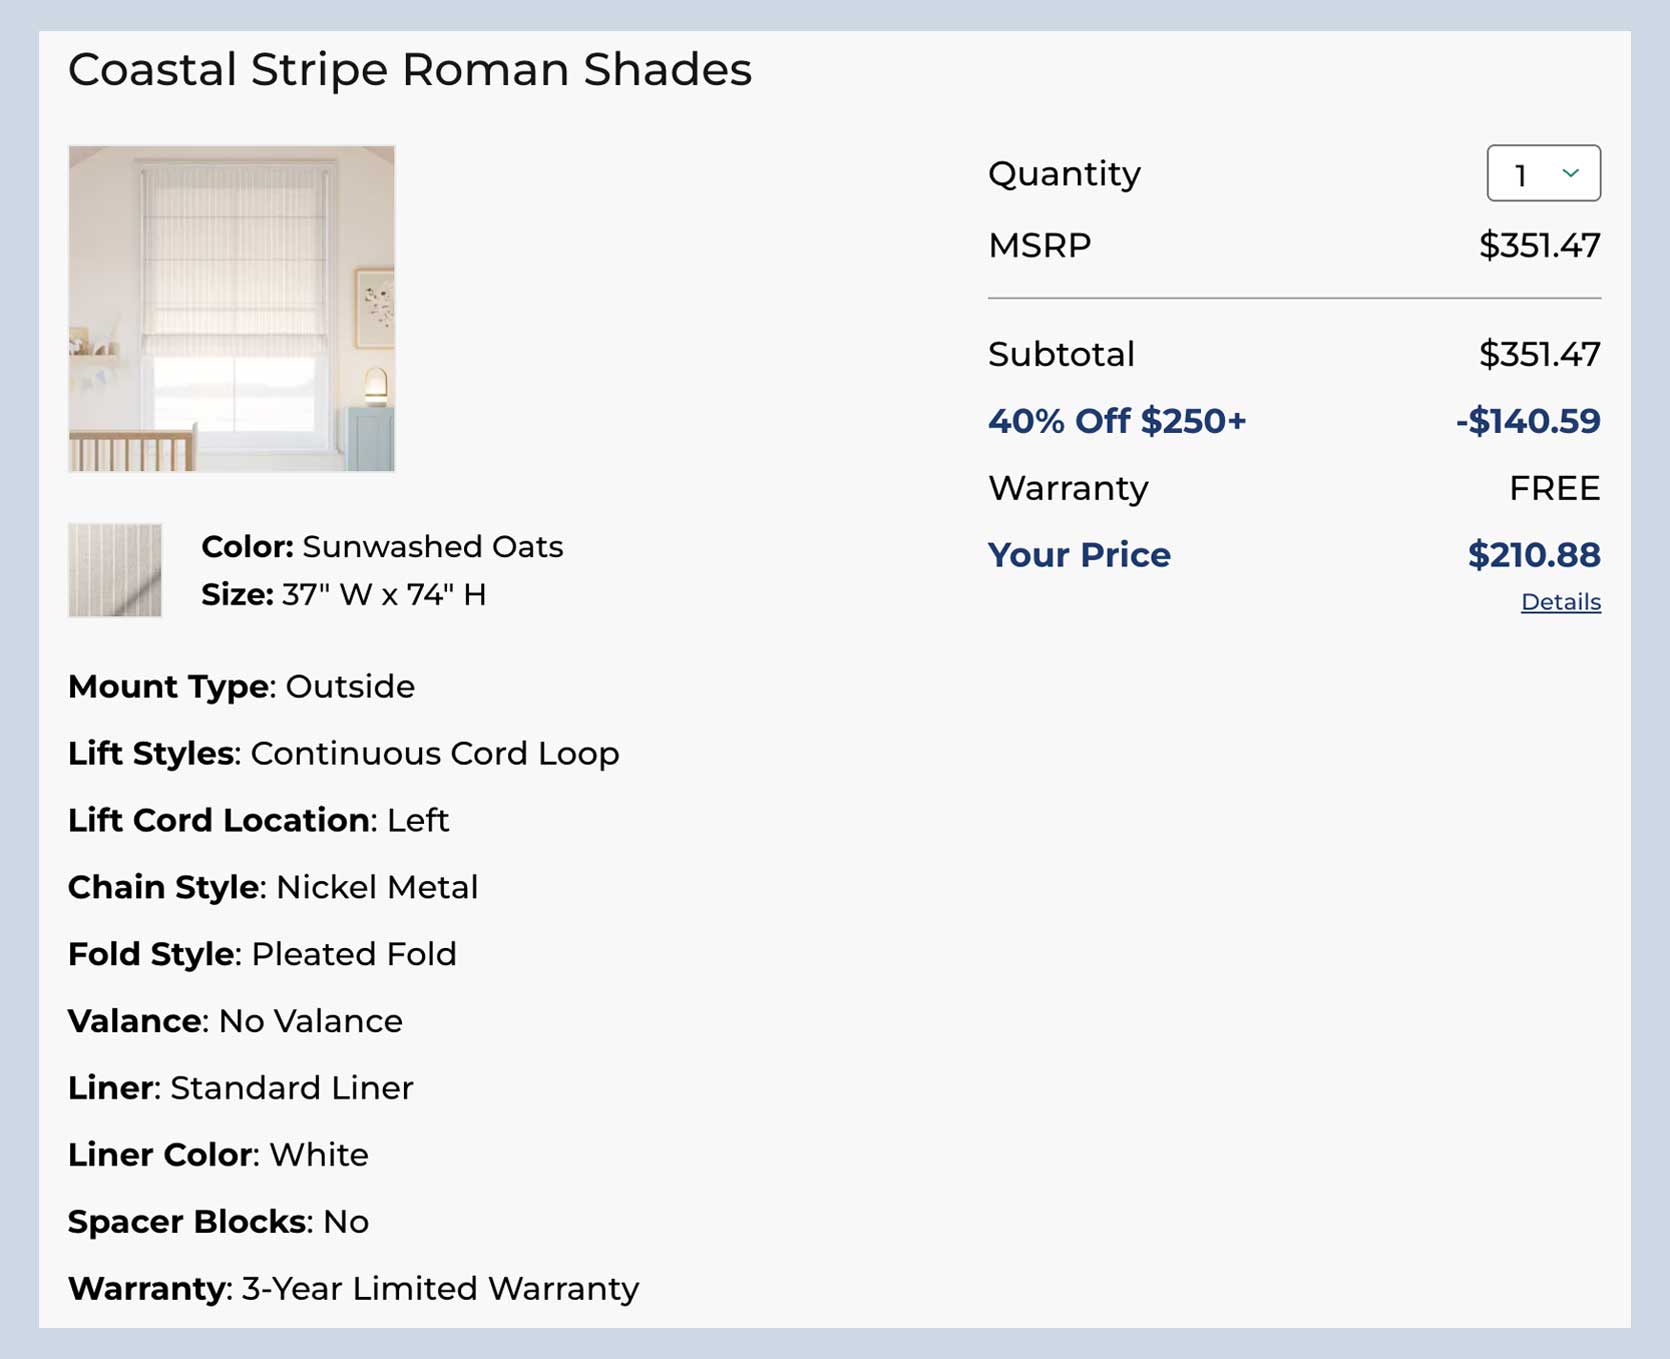
So, around $420 for two custom shades, which frankly isn’t much more than the cost of my DIY using the fabric I used had I purchased it out of pocket. Perspective, people!
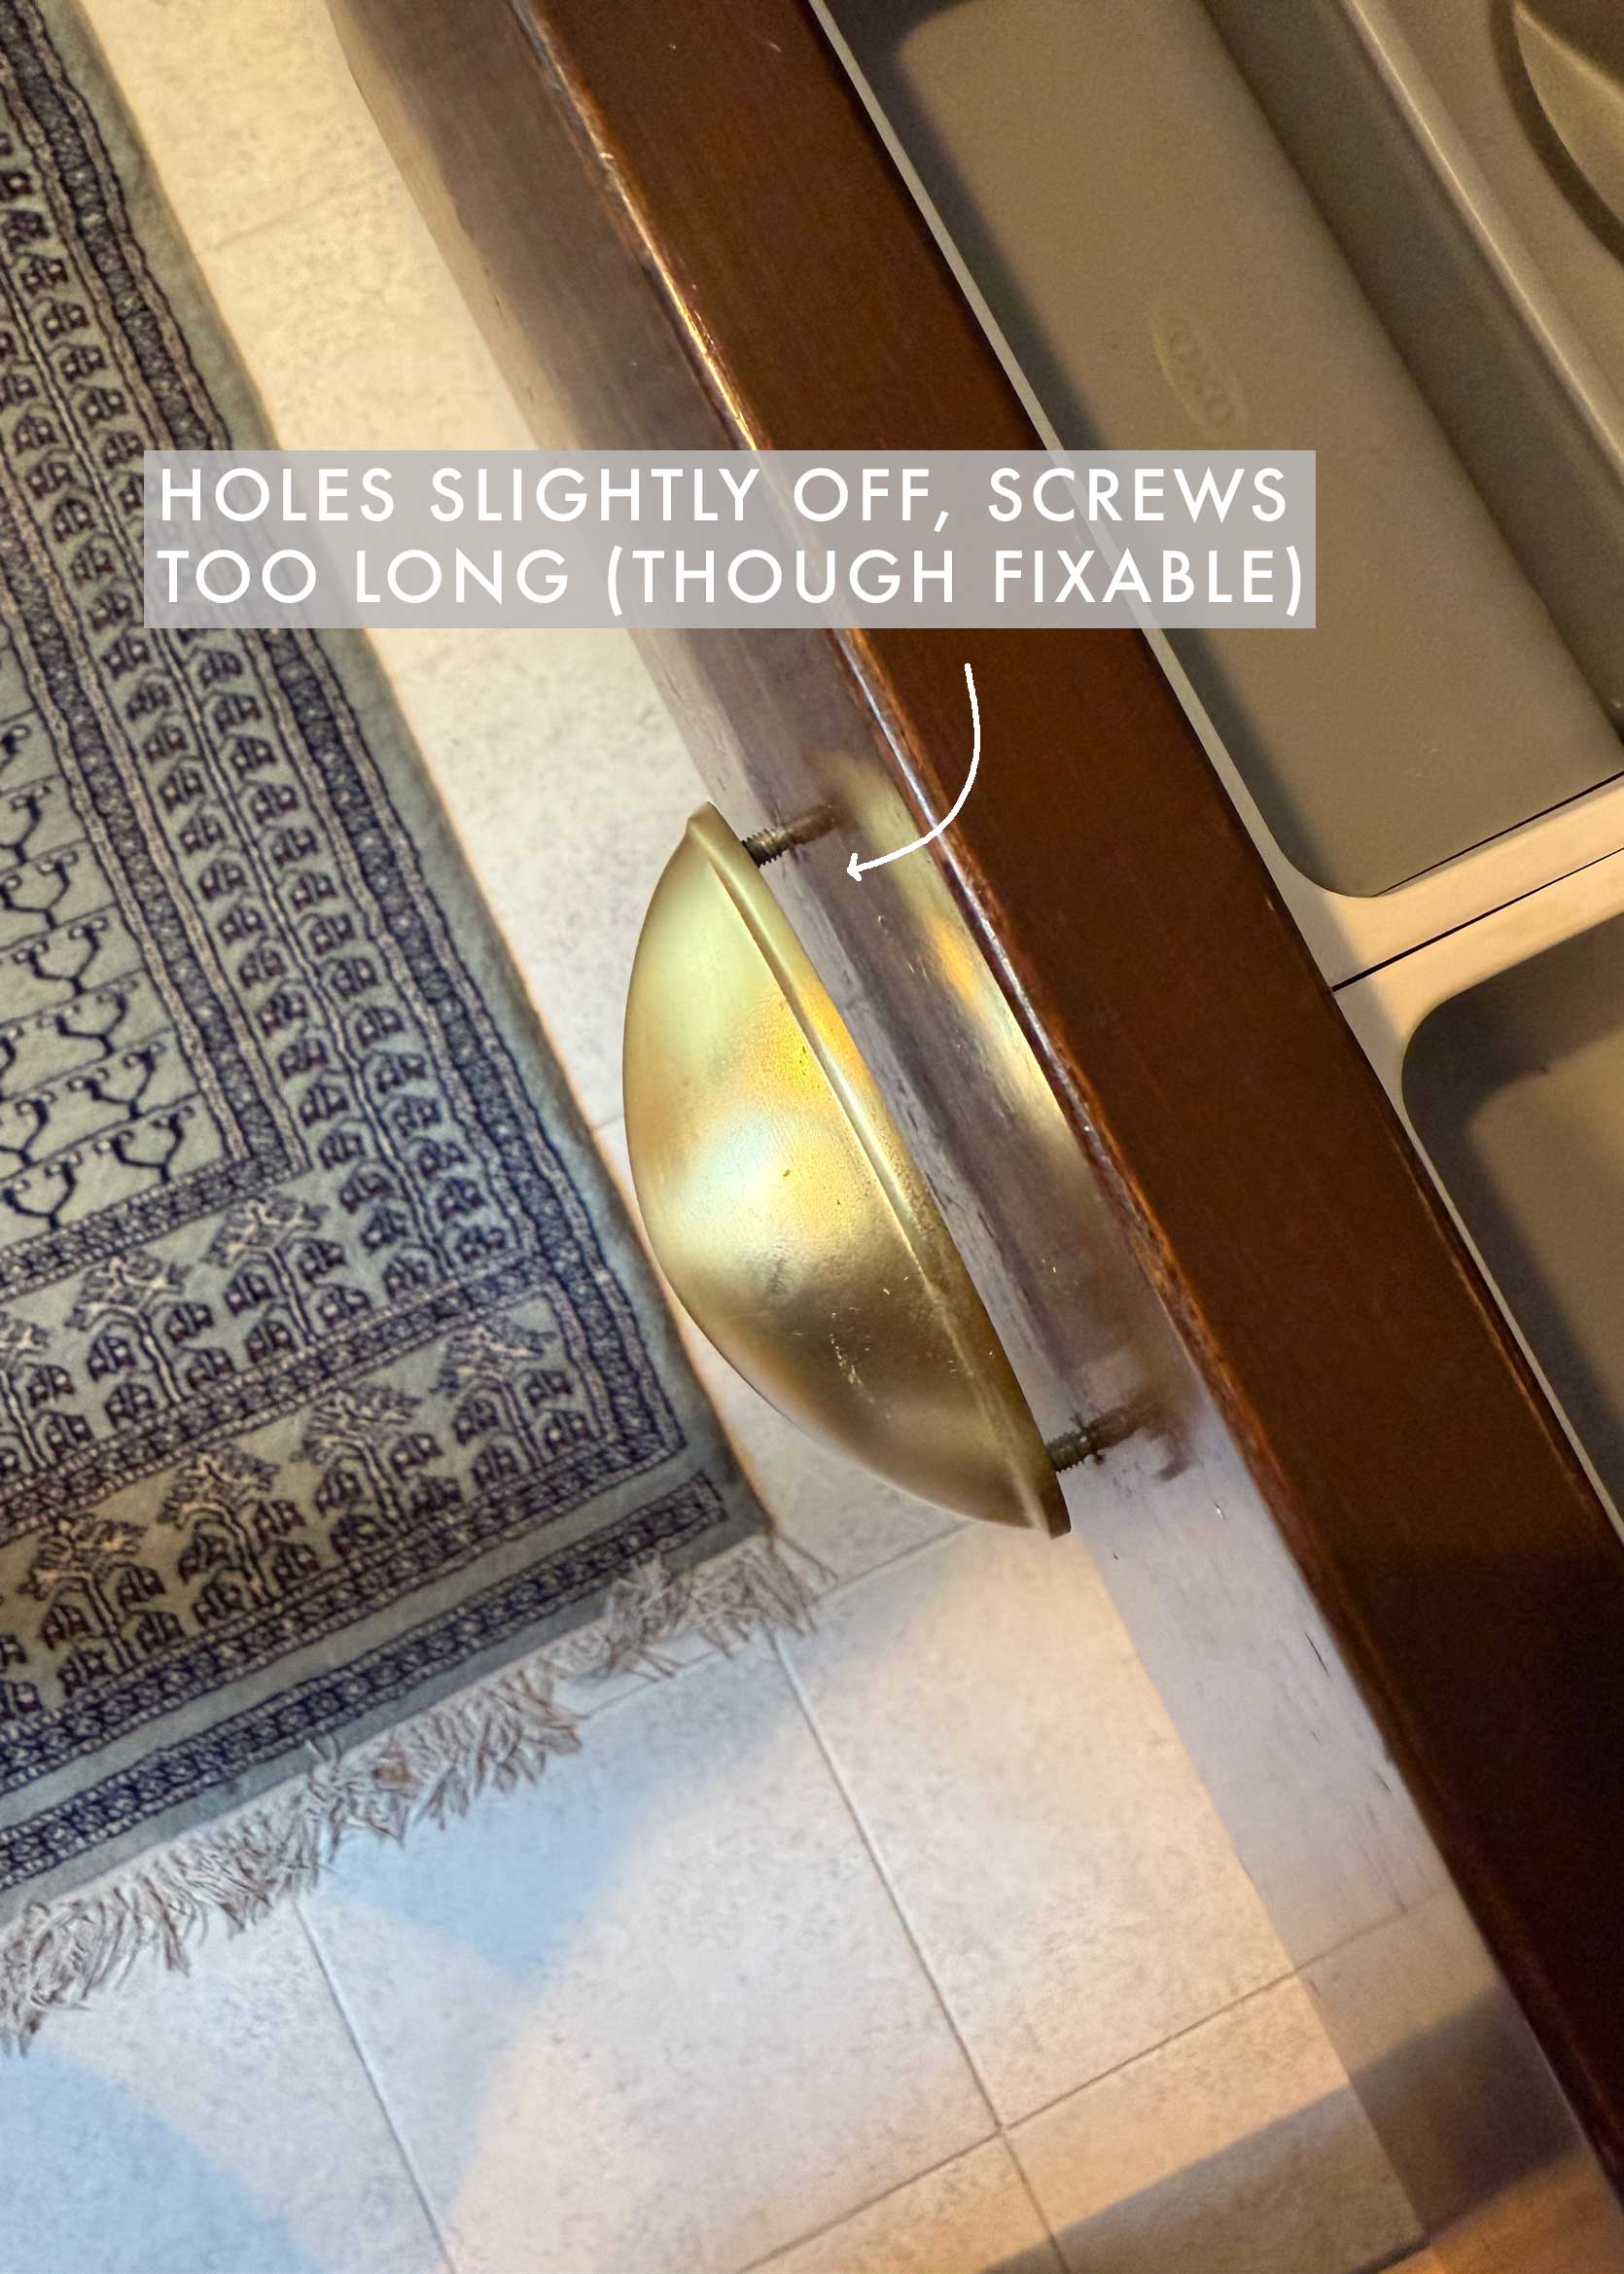
Peeling Wallpaper & Wonky Cabinet Hardware (Sort Of My Fault)
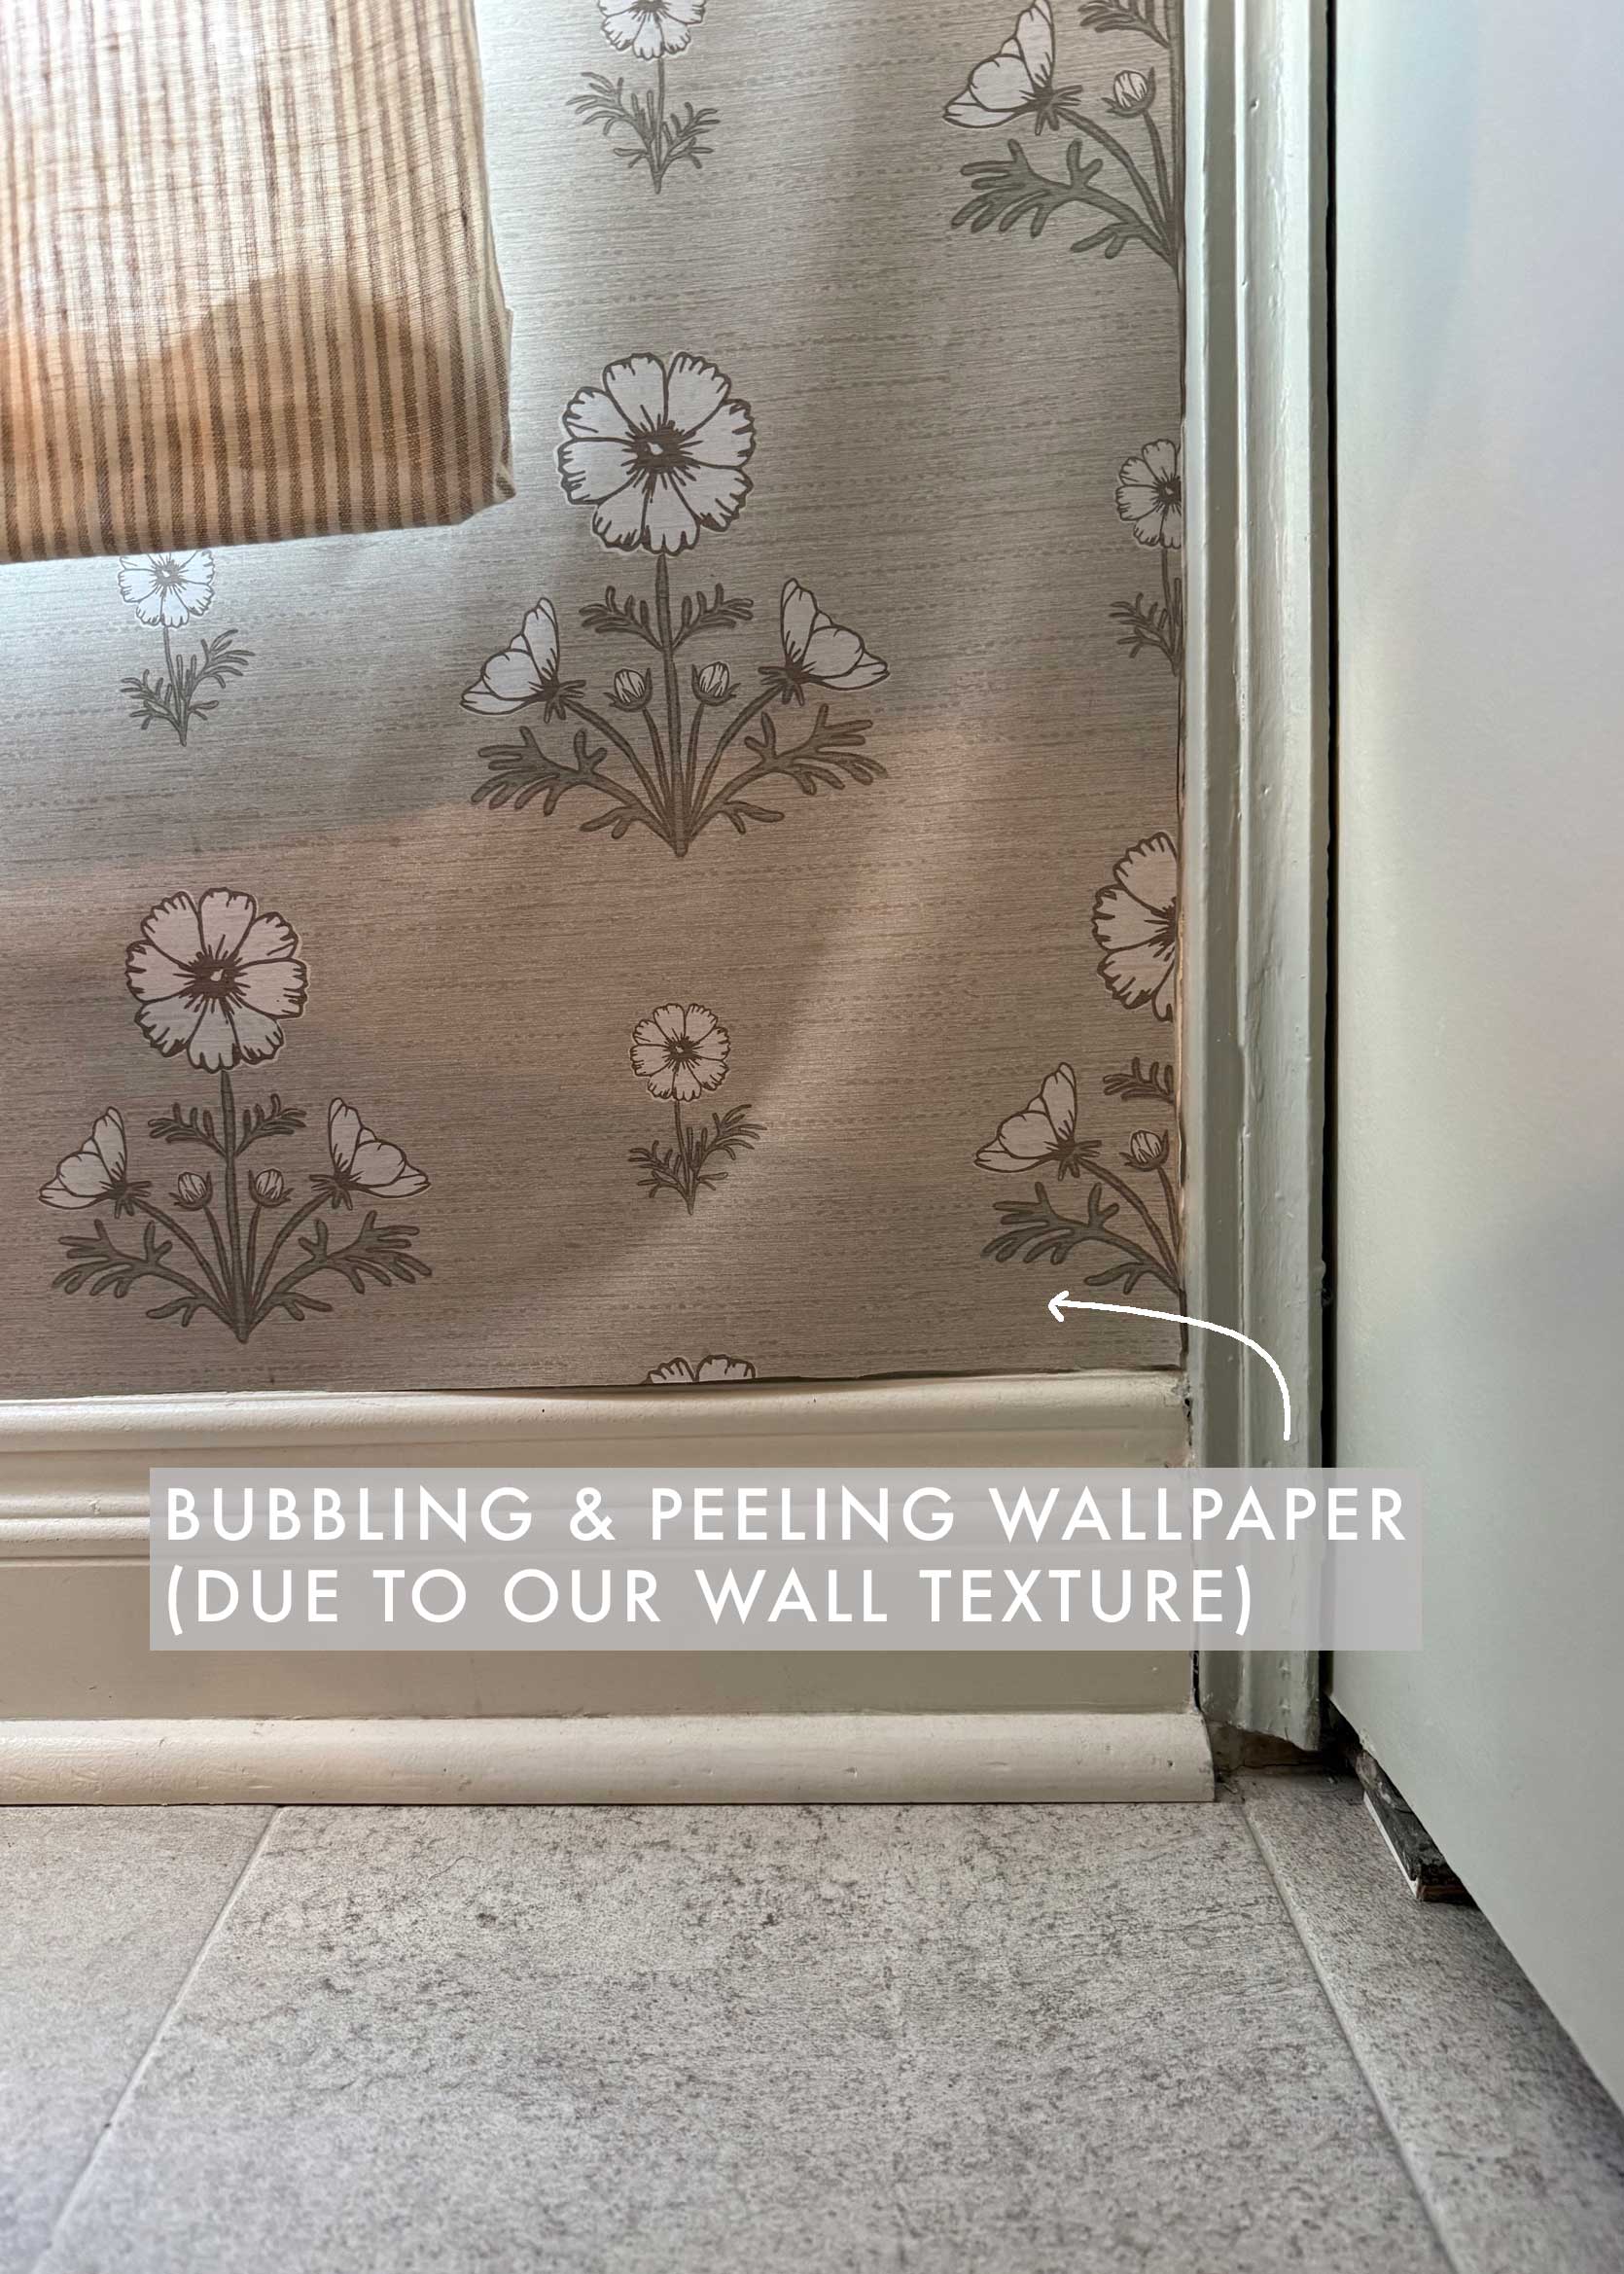
These are both sort of my fault. Part of the “not very good at this” angle, rather than “DIY is a waste of money.” Chasing Paper, who provided my beautiful wallpaper, warned me that the texture of my walls might create an issue with adhesion. They sent me a large sample piece to test for two weeks. If it stayed put and didn’t peel or bubble, my walls were compatible. That sample fared pretty well, but it wasn’t perfect. I wanted that paper in my kitchen so badly, I just looked past a few little bubbles and maybe a very slightly drooping corner. I’m not happy with myself for this, alright?
And the hardware was acquired very cheaply during a Prime Day from Amazon, when I still regularly shopped there. What they don’t tell you about very cheap hardware is that the measurements might be just slightly off. A knob is no big deal, but if a pull is even a few millimeters off, it will be very difficult to install or keep in place. I pushed forward anyway, not to mention, the screws were too long, and I didn’t bother to just get smaller screws or even nuts for the backs to keep them in place. Every time I open my drawers (which take some pressure because they are soft-close), the handle pulls out about half an inch, and I have to push it back in place. It’s fun times over here in Casa Hernandez.
Now, is it fair for me to proclaim that DIY is actually a waste of money just because I skirted the finer details in my own personal DIYs? Not, not in the least. The delusional designer in me still believes I could probably buy a storage banquette for a breakfast nook or even renovate a bathroom top to bottom. Maybe I could, but maybe it would just be worth it to pay someone else to do it…
I, however, am no professional, so for the sake of a fair argument, I enlisted the knowledge of my friend and DIY content creator Fariha Nasir of Pennies for a Fortune. Ironically, we’re working on a book together about DIY, though I thoroughly believe in her talents even if I don’t believe in mine.
A transcript of our recent chat, edited for brevity, on the matter follows:
What Does A Pro DIYer Have To Say?

EHD: There are things I’ve done in my home, especially my kitchen, that have not been worth the time or money. It was great for a photo, but everything is now broken. You’ve made a career out of DIY. Have you had anything similar happen to you?
Fariha: Yes! First and foremost, before I start a project, I research what others have done, really for that reason. I don’t even attempt a DIY if someone else hasn’t already tried it out and knows whether it’s worth it or not, or all the pitfalls. And even then, it can be risky. For example, I kept seeing people online making cabinets (for storage or for kitchens). It looked so easy and fun. Part of it, making the box, was easy, but when it came to doors, it just was not easy at all. Aligning the doors, making sure the hinges are right…it was such a pain. In the end, just to get my picture, I had to nail some of the doors shut. I was so embarrassed and never disclosed it to my followers. Even after Photoshopping out the nails, things were still slightly crooked. I had spent so much money on this stupid cabinet for my media room. It looked great in the photo, but it wasn’t functional. It was such a waste of money.
EHD: But I saw you make upper kitchen cabinets lately to extend them up to the ceiling. What changed?
Fariha: Oh, I hired those out! After that first cabinet project failure, I decided that I had to either give myself enough time and more material to practice making cabinets, or it just wasn’t worth my time to learn that specific skill. Knowing what I knew, it just wasn’t worth my time or money. I ended up paying a cabinet maker around $35 a door for my kitchen project, plus they installed them. It was far and away a better use of my time and money (less actually) when I hired this project out.
Something similar happened in a bathroom I was renovating. I tried to use Muscle Bound to put up some beautiful tile myself, but it was a disaster. The Muscle Bound made it so that I couldn’t actually adjust the small tile I was using, and it was so crooked. I ended up having to bring in a tile guy to do the tile justice and install it the traditional way.
EHD: I guess it’s all in knowing your limits?
Fariha: Yes. Unless you’re super determined and want to learn a new skill, I don’t see a reason for everyone to be doing challenging DIYs when it’s actually cheaper to get someone else to do it properly. It’s not always the case, but for my cabinet project, it was.

EHD: But you know this all in retrospect. How does someone know on the front end if something is going to be a waste or not?
Fariha: Unless you really want the satisfaction of making something yourself, you should always get a quote from a pro before starting. That way, you know what it would cost to buy or do before you go into it. You might be surprised that something doesn’t cost as much as you think it does. But, of course, sometimes things are cost-prohibitive, and doing them yourself is a huge money saver. You have to know yourself. Are you going to be working on that thing for months and months and then walk away from it unfinished? These things happen. You might not realize you’re in over your head until you’re there, and that’s a huge waste of everything!
EHD: So…when is it worth it exactly?
Fariha: The building process can be such a high; even if you fail and have to do things more than once, it can make it worth it in the end. If you’re a beginner, know that it’s going to be harder than anyone online tells you. You might not save any money, or spend more money than just having bought the thing or hiring someone, but if pride and satisfaction is your goal, it’s always worth it in the end.
EHD: iring things out. My mind goes to woodwork and carpenters. Even me, who knows design, wouldn’t know the first thing about hiring a carpenter. Do you have to draw things out for them? How do you find them?
Fariha: First off, a skilled finish carpenter is not someone you’re likely hiring for small home projects. They work for contractors. Find a handyman who’s good at a lot of different things. You can find them on Yelp, Angie’s List, and Craigslist. Ask around. But yes, you have to give them pictures or even just super rough sketches with measurements for what you want the end result to be. Most carpenters/handymen can work from inspiration pictures and measurements. For my kitchen cabinets, I hired a cabinet maker, so there are some specialties, but for most small things, a skilled handyman can handle most tasks.

EHD: You create home content for a living. Do you think there are a lot of just…bad tutorials out there? Done for them just to check a box and post a TikTok or video?
Fariha: [laughs] Oh, yes. For example, I saw a tutorial for a curtain pinchpleat hack where they take the pleater tape, and attach it with iron-on hemming tape. I don’t know who they are fooling, but that does not hold. The weight of the tape, let alone the hooks…it just doesn’t work. I tried it myself and was so excited to share this “no-sew” hack with my community, but I ended up just sewing it. What a waste of a project.
The job of a content creator is to make things look easy. But it’s not. Especially not for a beginner. It’s so intimidating to even go to a hardware or hobby store for the first time by yourself. You don’t know where things are, what questions to ask. My friend, for instance, was trying to make a DIY bulletin board for her daughter from something she saw on TikTok, and it ended up being such a mess. Nothing about it was easy: It wasn’t easy to cut the foam board like in the video, so she had to rebuy it and have Home Depot cut it for her. The tutorial didn’t show how to hang the board when done, and it was so frustrating to figure out.
EHD: All that said, would you say DIY is a waste of money or totally worth it?
Fariha: No, I don’t think it’s a waste of money if you have a basic level of skill for home projects. It’s a learning curve, though, for sure. Projects like painting, installing wallpaper, installing your own light fixtures, sewing pillows and even curtains, or more craft-based DIYs are great places to start to feel some accomplishment. Figuring out how to put up wallpaper will save you thousands. Woodworking is on another level. You’re going to break a lot of eggs, figuratively speaking, in the process. Things might not always work out. Things will break. Things will not get finished. Things will not be precise or polished, possibly. It’s all part of it.
The Final Word On DIY: Solid Time Investment Or Waste Of $$$?
I can’t necessarily bring down the hammer of justice on a final verdict here, because everyone has such varying skill levels, tolerances and desired outcomes. You need to know yourself, understand how comfortable you are with redoing things if they don’t go according to plan, and even with things not being picture perfect. Will you be able to look past the somewhat shoddy caulking job on your picture frame molding? Do you have the patience to precisely cut 150 pieces of tiny tile for a bathroom reno? Are you afraid of even going into a Home Depot without a savvy buddy? Maybe start small, or not at all.
Find a project in your home you can feel good about completing that won’t cost you in confidence, patience, and money. Maybe spray mount some linen fabric onto a picture mat. Swap out the knobs in your kitchen, or lay some peel-and-stick checkerboard floors if you’re feeling frisky. But maybe get a quote for those custom arched bookcases you saw someone else do on Instagram that you swear you’re capable of doing, even though you couldn’t pick a miter saw out from a collection of hammers.
I say this with love. Prove me wrong…see you in the comments.
Until next time, friends.
Opening Image Credits: Design by Arlyn Hernandez | Styling by Emily Edith Bowser | Photos by Veronica Crawford | From: Arlyn’s Rental Kitchen Reveal Just Might Have You Wishing You Had Brown—Or Even Cherry— Cabinets (Yes, Really)
View the original article and our Inspiration here
Leave a Reply